Crunchy Cacoa Candy

“Change is never led by consensus. That’s what pioneers are for… True innovation is usually disruptive of traditional business or societal norms, and thus the consensus response to a new idea — no matter how good — is usually denial.”
The Art and Science of Low Carbohydrate Performance by Dr Jeff Volek and Dr Stephen Phinney

cacao-candy-1

Here’s a way to enjoy chocolate without having the added sugar or additives. One or two pieces of Crunchy Cocoa Candy is a very filling snack or dessert. Watch out, it’s very stimulating!

This recipe is NOT safe for someone on the Specific Carbohydrate Diet. This recipe is good for a ketogenic fast.

Many people love chocolate but are trying to find healthier ways to consume it. Let’s Do… Organic creamed coconut has a gritty texture for a coconut cream, but this texture just adds to the pleasant crunchiness of the cacao nibs.?

200g Let’s Do… Organic creamed coconut or other creamed coconut
1-2T organic coconut oil
1-2T local raw honey (optional)
1/4c organic cacao nibs
2-3 large pinches sea salt
Prepare a tray with a layer of wax paper. Heat water in a sauce pan big enough to accommodate a 2c Pyrex measuring cup. Put the creamed coconut and coconut oil into the measuring cup and gently warm until melted. Remove from heat and add the honey, cocoa nibs and sea salt. Mix very well. (I like grinding the sea salt with a bird’s eye pepper and using few large pinches of the spicy sea salt to flavor the cocoa nibs.) Line a 8″x8″ glass baking tray with wax paper. Pour the mixture onto the wax paper and spread until fairly thin. Cool in the freezer for 10-15 minutes. Remove the partly cooled candy and cut into 32 pieces.

One or two pieces of candy is very stimulating and would be best consumed in the morning. Cacao nibs contain theobromine which is a nervous system stimulant similar to caffeine.

cacao-candy-1a

In a 2c Pyrex measuring cup melt the coconut cream and coconut oil. Stir frequently.

cacao-candy-2

Pour the candy into the 8″x8″ glass baking tray and cool in the freezer for 10-15 minutes.

cacao-candy-3

After the candy cools but before it gets too hard, cut the candy into 32 pieces. If you wait too long, the candy will get too hard and will crack like the two pieces in the front.

Healthy Household: Comfort for Colds

licorice-lozenges

Once you get all the ingredients together making lozenges are easy. My girls really like the taste too. Remember to always label your homemade medicines.

March is one of the worst months for colds and flu. Here are some strategies for avoiding colds and flu.

Tip Number One: Eat a diet of nourishing traditional foods. Avoid all processed foods and sugary snacks. Make sure your diet has plenty of healthy fats. Eat coconut oil which has anti-viral components. During the winter, eat pastured lard which is high in vitamin D. During the winter and early spring, supplement your diet with fermented cod liver oil and high vitamin butter oil. If you have a source of raw milk you only need to supplement with fermented cod liver oil. Remember to eat your garlic. Use at least one crushed or minced fresh garlic clove everyday in your food.

If you do get sick, there are a few recipes below that will help your family avoid taking pharmaceutical drugs. Remember that colds and flu come from viruses which hate heat. Fevers kill viruses. Fevers should be allowed to take their course in most cases, except in very young children or very high fevers. An out-of-control fever is a medical emergency. Use good sense and get to emergency services.

Tip Number Two: Take care of yourself early in the illness. When you first get that sense that you are getting sick try taking Aconite 30c . This is a homeopathic remedy for stopping colds and flu but only works in the very earliest stages of an emerging illness. I started using homeopathic remedies because I wanted to do something very gentle for my children when they were ill. I have found homeopathic remedies work surprisingly well with young children. I use the Helios Homeopathic First Aid Kit.

If you prefer herbs, this is the time to use oregano essential oil (Origanum vulgare) which is a good addition to your Herbal First Aid Kit. (I will talk about making your own Herbal First Aid Kit in a later posting.) This is a very strong essential oil and can be used many ways. For an emerging sore throat, try 1-2 drops in the mouth twice a day. Swish the oregano essential oil around your mouth for a few minutes and then swallow. Some people find straight essential oils too powerful and will cut it with a small amount of olive oil. This treatment is better for adults. Children don’t like the strong taste.

If you prefer herbs, this is the time to take Echinacea Extract or Angelica Extract. Extracts take three to six weeks to prepare so it would be best to make the extracts in the fall or you will have to purchase the extracts at a health food store. Many people find Echinacea Extract works very well to improve immune function. I find Angelica Extract to work better for me. We are all different so you will have to experiment to find which extract will work best for you. The extracts should be taken three times a day in hot water. Along with talking an extract, make up a Ginger Infusion or Cold Away Infusion and drink this throughout the day. If you have a really sore throat find a local supply of propolis and suck on a small piece.

Remember food should always be your first medicine. If you are feeling poorly, this is the time to make some nourishing bone broths, stews and soups. Warming drinks are very comforting. Get plenty of rest. This is the time to increase your consumption of coconut oil to a therapeutic level which is thought to be 2-3 tablespoons a day.

Tip Number Three: Have some cold supplies in your pantry, ready for use. Here are six recipes that will come in handle if someone gets sick in the household. The Ginger Infusion will work for most colds and is liked by children. Cold Away Infusion is better when you are really sick and can’t seem to shake the cold or flu. Elderberry Syrup can be taken during flu season to avoid getting sick or can be used after the cold or flu sets in. Licorice Lozenges are really nice on a sore throat. Honeyed Ginger is good for a sore throat or nausea.

angelica-extract

Making extracts are very easy but will take about six weeks to infuse. Start making medicines in the fall for the winter months.?

Echinacea or Angelica Extract
1/2c Echinacea root (Echinacea purpurea) or Angelica root (Angelica archangelica)
2c clear Vodka or Tequila, 40% alcohol
Use a small pint-sized glass canning jar with a plastic lid. Put either the Echinacea root or Angelica root into the jar. Add the alcohol of choice and fill the jar. Label the jar with the name of the plant, percentage of alcohol, today’s day, and the decanting day. Decanting day will be in six weeks. The jar will need to be turned over every day for at least the first week. On decanting day, use a cotton cloth to squeeze out all the liquid from the roots. Some herbalists use a juicer to get all the goodness out of the plant materials and into the extract. (Due to all the woody parts, I broke part of my juicer trying this, so be careful if you try this with your juicer. For home preparation, squeezing out all the liquid is far easier. Sometimes it’s best not to copy the professionals!) Store the extract in a dark glass bottle. If available, use a dropper top for easy dispersal.

Ginger Infusion
1/2c fresh ginger (Zingiber officinale), grated finely or 1/3c dried ginger
1L boiling filtered water
local raw honey, to taste
lemon, freshly squeezed, to taste
Put fresh or dried ginger into the glass jar. Pour boiling filtered water over the ginger and fill the 1L glass canning jar to the top. Put the lid on the jar and let the infusion steep for 4 hours or overnight. Squeeze out all the juice from the plant material into the infusion. When ready to drink, gently re-heat the infusion. Do not allow the infusion to boil or you may lose some of the medicinal properties of the plants. Add freshly squeezed lemon juice and local raw honey to taste. This drink is very soothing on a sore throat.

Cold Away Infusion
1/4c Rosehips (Rosa canina) or Yarrow Leaf (Achillea millefolium)
1/4c Elder Flowers (Sambucus nigra)
1/4c Peppermint Leaf (Mentha piperita)
2L boiling filtered water
Put plant materials into 2L glass canning jar. Pour boiling filtered water over plant materials and fill the 2L glass canning jar to the top. Put the lid on the jar and let the infusion steep for four hours or overnight. Squeeze out all the juice from the plant material into the infusion. When ready to drink, gently heat up the infusion. Do not allow the infusion to boil or you may lose some of the medicinal properties of the plants. Consume as needed.

Elderberry Syrup
Take 1T of syrup everyday to avoid colds and flu. Or if ill, take 1T three times each day.
1/2c Elderberries (Sambucus nigra)
5-10 cloves (Syzygium aromaticum)
1 cinnamon stick (Cinnamomum zeylanicum)
1-2T fresh ginger (Zingiber officinale), grated finely
2c filtered water
1/2c local raw honey
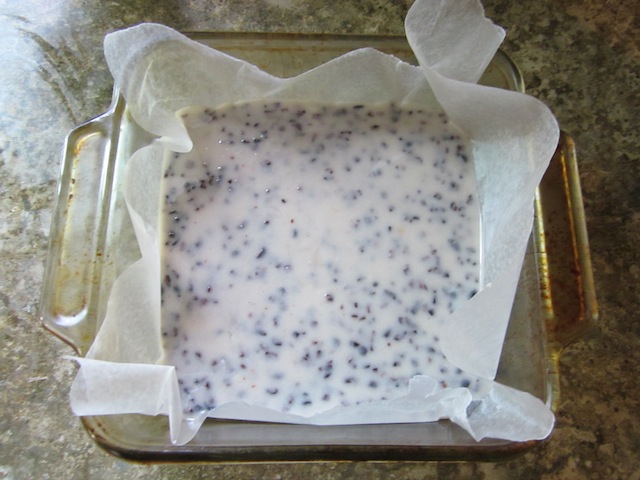
Bring filtered water to a boil. Add Elderberries, cloves, cinnamon stick and ginger. Reduce heat and simmer for 30 minutes until liquid is reduced by one half. This is known as a decoction. Squeeze out all the juice from the plant material into the decoction. Let the decoction cool before adding the local raw honey. Stir well and refrigerate. This syrup will last for months in the fridge.
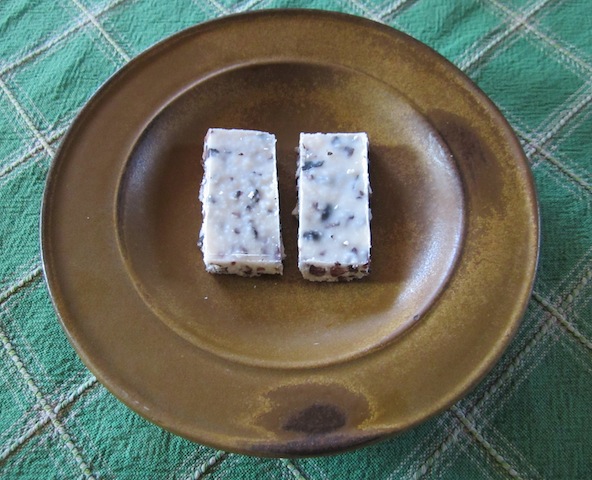
Licorice Lozenges
1c Slippery Elm powder (Ulmus rubra)
1/2c Licorice Root (Glycyrrhiza glabra)
2c filtered water
1/4c local raw honey
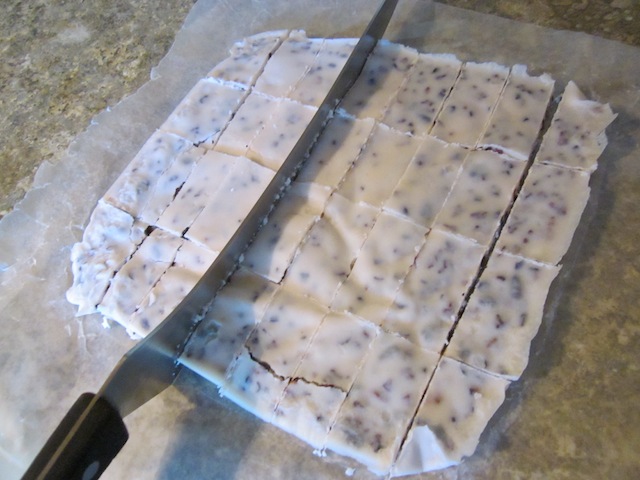
Bring the filtered water to a boil and add the Licorice Root. Simmer for about 30 minutes until at least half of the water is gone. This is a decoction. Squeeze out all the juice from the plant material into the decoction. Let the decoction cool before adding the local raw honey. This avoids destroying the healing properties in the raw honey. Put the Slippery Elm powder in a bowl and add enough licorice decoction to make a soft dough. Roll out the soft dough on more Slippery Elm powder to a thickness of about 1/4 inch. Cut the dough into small 1/2 inch squares. Place the lozenges in a dehydrator overnight until dry. The lozenges will last for months in a metal tin.

Honeyed Ginger
1 organic ginger root (Zingiber officinale), sliced diagonally
1c filtered water
enough local raw honey to cover ginger
1 pint glass canning jar
Slice the organic ginger diagonally. You do not have to peel the ginger if it is organic. Put ginger slices in boiling water and reduce heat to very low. Cook the ginger for about 40 minutes until the ginger becomes translucent. Reserve the ginger liquid and water down for a soothing tea. Traditionally, this honey would be cooked with the ginger, but I feel it is best to just store the ginger in enough raw local honey to cover the ginger. If you find the ginger just too spicy, very gently warm some of the honey while stirring the ginger. Gently heat for another 40 minutes. The ginger will become more and more translucent. Store in a glass jar in the fridge. The ginger flavored raw honey can also be used as a treatment for a sore throat. Just spoon it out by the teaspoon. The relief will be immediate.

For more recipes please see Healthy Household: Staying Clean Safely and Saving Money.

Cholesterol: Foe or Friend

know-your-fats

This is an excellent book to help you learn your fats. I used to skin my chicken to get rid of saturated fat. Wow, was I misinformed.

Our Society’s views about cholesterol are based on the work of Ancel Keys and the Lipid Hypothesis. The Lipid Hypothesis “proposes a connection between plasma cholesterol level and the development of coronary heart disease”.

In the last few years there has been increased questioning of the Lipid Hypothesis. What if the Lipid Hypothesis is wrong? This would mean there is a lot of misinformation in the general population. Our society has spent an enormous amount of resources to battle the evils of cholesterol. There is a whole industry developed to fight this scourge. This means there is a lot of resistance to change, because so many people’s livelihood depend on the battle continuing.

The Weston A Price Foundation does not support the Lipid Hypothesis. This is part of an email correspondence with someone interested in the views of the Weston A Price Foundation on saturated fat and its evil twin cholesterol:

I have written very little about cholesterol on eatkamloops.org. This is mainly because of embarrassment. I completely believed the Lipid Hypothesis. It was very hard for me to admit I could be so wrong.?The only writing on this topic that I can find is The Grease Bucket: Something from Nothing.

The issue around fats is a very important area to get clear on. There is research that shows that people with cholesterol below 150mg/dL are at a high risk of cancer. Also, that women with the highest cholesterol levels live the longest. The research is very confusing and I am not going to tell you I know the answer because I don’t.

The Specific Carbohydrate Diet radically improved my health but it was after going high fat with the Specific Carbohydrate Diet that my health problems finally resolved. I would have never gone high fat if it wasn’t for the Weston A Price Foundation and their materials. I was brainwashed. I couldn’t see that what I thought was a “healthy diet” wasn’t working for me. I nearly crashed my endocrine system. I will say this: a low fat diet is a slow killer. If you stay on it long enough, you want to die, because you feel so crappy and are sick all the time.

The Weston A Price Foundation’s website has a number of excellent essays on this topic. Do your own research. Check out the facts, and make your own informed decision. Please read Know Your Fats.

And no, I do not think industrial vegetable oils are safe at all. Remove all new fangled foods from your diet. Eat butter, coconut oil and grease for cooking. Use organic extra virgin olive oil on salads. If you are looking for a laugh, please watch the trailer for the movie Fat Head called Big Fat Lies. In the eternal words of the creator of Fat Head, Tom Naughton:
“You’ve been fed a load of bologna.”

Updated December 5, 2009: Here is a link to an interview with Utte Ravnskov called Does High Cholesterol Really Cause Heart Disease? Utte Ravaskov is the author of The Cholesterol Myth. If you would like further reading about cholesterol Good Calories, Bad Calories by Gary Taubes will give a historical perspective on the issue. Both books are available at the Kamloops Public Library.

Cooking with Grass-Fed Meat and Fowl

beef-cabbage-salad

Grass-fed meat needs to eaten rare. This is a favorite breakfast with grilled grass-fed beef, thinly sliced, with a salad or buttered cabbage.

If you are new to grass-fed products and feel unsure about how to cook meat or fowl please read Achieving Culinary Success With Grass-Fed Beef. This is a long essay but it explains the differences between conventional and pastured animals. The essay discusses the interesting topic of artisan butchery and how this specialty is being regulated out of existence.

One tool that is very useful in cooking pastured meat and fowl is to “put away your timer and get a good meat thermometer”. I started doing this after reading The Grassfed Gourmet Cookbook by Shannon Hayes. I found it took all the mystery out of cooking a turkey or a very large roast. The fowl or meat would always turn out wonderful. The temperatures below are from her cookbook and I have found the temperatures to always produce a succulent meal. She recommends allowing the meat to sit on the counter and rest after cooking. It is interesting to watch the temperature continue to increase after the meat is out of the oven. The temperatures are for grass-fed meats and the standard recommended temperatures are in parentheses. I like my meat rare inside, so I normally use the lower suggested temperatures.

Beef: 120-165F (140-170F)
Bison: 120-165F (140-170F)
Chicken (unstuffed): 120-165F (140-170F)
Duck: 160-170F (180F)
Goat: 120-145F (140-170F)
Goose: 170F (180F)
Lamb: 120-145F (140-170F)
Rabbit: 160F (160F)
Pork: 145-165F (170F)
Turkey (unstuffed): 160-165F (180F)
Veal: 120-165F (140-170F)
Venison: 120-165F (140-170F)

One of the joys of buying whole animals, is having a choice of cuts that you have never tried before. If you do not know your cuts of meats, you can learn about cuts from books such as the Joy of Cooking. I have found butchers very helpful with learning about cuts of meat and offal. Get every part of the animal you can, even if you don’t know what to do with it. It’s fun to learn how to cook strange parts of the animal! Another great source is Offal Good.

Dry heat is better for some cuts of meat and moist heat is a must for others. The use of rubs and pastes tenderize meats and add exotic flavors. Or you can tenderize with devices like Jaccard Meat Tenderizer. Super slow cooking can soften the toughest meats by cooking at the lowest temperature your oven will go. Most modern ovens will not go below 150-170F.

Remember to save the juice, bones and fat drippings from fowl and meat. The juice is a wonderful base for soups and stews. The bones can be saved in the freezer for bone broth. The fat drippings are good for frying or oven roasting just about anything. I always try to have a grease bucket in the fridge or by my stove for quick use. Fats from animals can take high heat frying much better than even butter which can burn. Read The Grease Bucket and Beautiful Bone Broth for more information. Coconut oil is safe for cooking but save your extra virgin olive oil for pouring over salads or other unheated foods. I do not recommend using industrial oils of any kind. Actually, I think industrial oils and high fructose corn syrup (HFCS) are the two worst modern food additives. Unfortunately, they are in most processed foods.

Full-flavored meat comes from animals that have led a full life… Life intensifies flavor, and modern meat animals are living less and less.
On Food and Cooking: The Science and Lore of the Kitchen by Harold McGee

Swine Flu: Delicious Cure

coconut-oil-snack

This coconut oil based snack is easy to get the children to eat. It will easily get your coconut oil consumption up into a therapeutic range. I store the snack in the freezer.

On May 7th, I wrote a blog called Swine Flu Alert: What to Do. The posting gave some alternative treatments to help your system avoid viral infections. Lauric acid in coconut oil is converted by the body to monolaurin. Coconut oil has been found to have an antimicrobial effect. If you would like to study this topic further, please read Dr Mary Enig’s essay: A New Look at Coconut Oil.

I have had some requests for recipes to increase coconut oil consumption. Dr Mary Enig recommends 10-20 grams of coconut oil per day to get into a therapeutic range. In her book Eat Fat, Lose Fat she recommends drinking the coconut oil in hot water before meals for weight loss. In my opinion, this is not a great taste experience, but it has been an effective weight loss treatment for many people.

I have two delicious recipes for you to increase coconut oil consumption in your diet and which may help avoid viral infections. Just remember if you are trying to use food as a medicine, make sure you get the best quality you can find. Find the best local raw honey and organic virgin coconut oil. If you can find raw butter use it or find the best organic pastured butter. Please note the Weston A Price Foundation does not support the use cocoa products. So use with care.

Coconut Bark Almond Joy
Here is the recipe for Coconut Bark Almond Joy. I would suggest a few changes to make the recipe WAPF friendly. Soak and dry the nuts and use local raw honey as a sweetener. I would find 1T of raw honey too sweet. If eating cocoa powder is a problem for you, use some raw butter or cocoa butter and make a “white chocolate” version.
6T organic coconut oil
1tsp organic vanilla extract
2T organic cocoa powder or raw butter or cocoa butter
1T local raw honey or organic maple syrup
2T dried organic coconut
1/4c chopped or whole, soaked and dried almonds or pecans
Cover the bottom of a glass baking tray with wax paper. Turn up the sides so liquid will not run out under the was paper. Cover the was paper with the chopped or whole nuts. Melt the coconut over low heat. Don’t overheat the coconut oil, just melt it. Add the vanilla extract, cocoa powder, sweetener, and coconut. You may have some extra mixing to get the honey to dissolve into the other ingredients. If you do not get the honey to dissolve well, you will have a sticky layer at the bottom of the bark. (This does not happen with maple syrup.) Pour the mixture onto the wax paper and nuts and put the baking tray, as flat as possible, into the freezer. After about 30 minutes the bark will be ready to break into pieces and serve. Store in the freezer.

nanaimo-bar

Nanaimo Bars are easy to make and a delicious way to increase coconut oil consumption.

Nanaimo Bars
Here is the official recipe for Nanaimo Bars. I have changed the ingredients so much that I have included them here. Cut into 1 or 2 inch bars and store in the freezer for later use.
Bottom Layer
1/2c organic cocoa powder
1c soaked and dried pecans
1c soaked and dried walnuts
1c dried coconut
1/4c organic virgin coconut oil
1/4 raw butter (organic pasteurized butter okay)
2T local raw honey
2 raw pastured egg yolks
Middle Layer
3T raw cream (organic pasteurized cream okay)
1T organic vanilla extract
1/4c raw butter
1/4c organic virgin coconut oil
2T local raw honey
1 raw pastured egg yolks
Top Layer
3T raw butter
2T organic cocoa powder
1tsp local raw honey

Butter a 12″x12″ glass baking pan. For the bottom layer combine the pecans, walnuts, coconut and cocoa in a food processor. Blend well and add the coconut oil, honey and egg yolks. Spread smoothly into the bottom of the glass baking pan. Put the pan into the freezer to harden. Clean the food processor and blend the ingredient for the middle layer. Blend the butter, coconut oil, cream, vanilla extract, honey and egg yolks together. Spread the middle layer onto the bottom layer after it has mostly hardened from freezing. Clean the food processor and blend the top layer of butter, cocoa and honey. Make sure the middle layer is very frozen before thinly spreading the top layer. The contrast between the “sweet” middle layer and the “bitter” top layer gives Nanaimo Bars their special flavor.

Update August 17, 2009: I have changed the recipe by adding an extra egg yolk to the middle layer. This gives the layer a yellowish color and a creamier texture. I have changed the first layer from whole eggs to just the egg yolks. There is controversy about the safety of eating raw egg white. Raw egg yolks from pastured chickens are safe. Cooked egg white is safe but raw egg white has enzyme inhibitors that can cause digestion problems.

Update November 3, 2009: This is a audio presentation from www.mercola.com about swine flu immunization. If you are pregnant or considering getting the vaccination, please listen to this presentation called Swine Flu: One of the Most Massive Medical Cover-ups.