Homemade Stevia Extract

“Stevia leaves and stevioside are virtually calorie-free, beneficial in the prevention of cavities and do not trigger a rise in blood sugar. They are not only safe for diabetics and hypoglycemics, but in some countries stevia leaves are even prescribed as a medicinal substance for these conditions because they normalize pancreatic function and thus aid in the metabolism of sugar.”
Weston A Price Foundation: Sugar-Free Blues: Everything You Wanted to Know About Artificial Sweeteners

ek-stevia-extract

It has taken me a long time to discover a way to make a stevia extract that is sweet but without the unpleasant aftertaste.

“The whole stevia leaves contain a number of beneficial compounds, including ascorbic acid, calcium, beta-carotene, chromium, cobalt, iron, magnesium, manganese, niacin, phosphorus, potassium, riboflavin, selenium, silicon, sodium, thiamin, tin and zinc.”

Stevia is an excellent sweetener for people with metabolic syndrome or diabetes. It tastes incredibly sweet but some people dislike the aftertaste. I’m one of those people so I’m not a fan of stevia. Nevertheless, I have family and friends with blood sugar issues. It has taken me a long time to discover a way to make a stevia extract that is sweet but without the unpleasant aftertaste.

Normally, when making plant extracts infusions take 4-6 weeks. This does not work with stevia. The trick to making a nice stevia extract is to only infuse for less than 24 hours. During the infusion process, taste the extract every few hours. If the extract starts getting a foul taste, note the time and stop the infusion process. This method will produce a very sweet extract without the nasty aftertaste. I have also found that using homemade vanilla extract as the alcohol base improves the flavor greatly.

1tsp organic stevia powder
1/4c Homemade Vanilla Extract or organic vodka

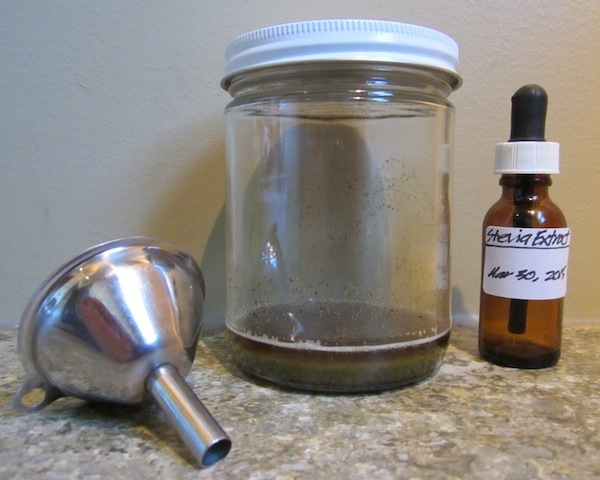
Add the stevia powder to the homemade vanilla extract and let the stevia infuse for no more than 24 hours. Longer infusions will bring out the unpleasant aftertaste. I don’t normally filter extracts but with stevia filtering is needed to avoid pieces of plant material staying in the extract and fouling the taste. So, filter the extract to remove any stevia powder. A coffee filter or cheese cloth will work well. Decant the stevia extract into a bottle with a dropper for convenient use. Add some more straight vanilla extract if you find the stevia extract too sickly sweet.

stevia-extract-2

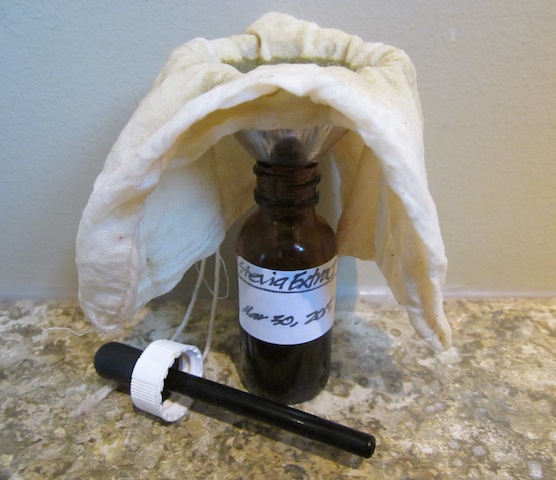
Use a coffee filter or damp cheese cloth to filter out the stevia. Filter a second time, if necessary. I’m still not a fan of stevia but this extract with vanilla is pretty good.

“When applied topically, the stevia leaves also fight acne and speed wound healing while also reducing the formation of scar tissue.”

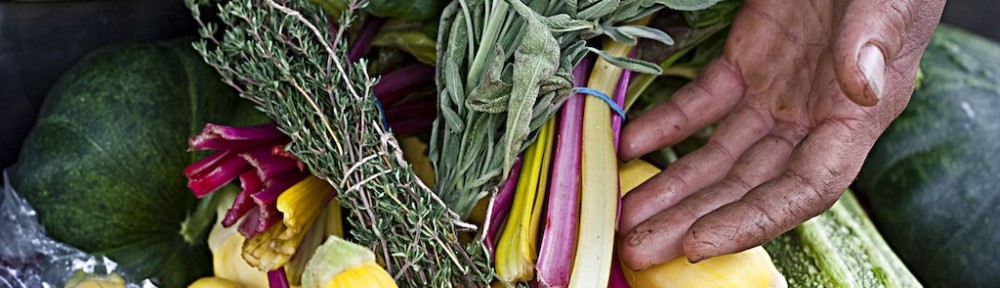
You can grow stevia at home. If you are looking to purchase, there is a local farm that grows stevia. They attend the Kamloops Farmer’s Market:

Suede Hills Organic Farm
Phil and Cindy Levington
6049 Thompson River Dr, PO Box 513, Savona, BC, V0K 2J0
T: 250.373.0191, C: 250.682.1188
www.suedehills.com
www.steviasweetsuccess.com
44km
certified organic STOPA farm no.166: organic stevia powder, alfalfa powder, pet supplements, worm castings

Seasonal Foods: Gazpacho Soup

gazpacho-soup

Gazpacho is a great way to enjoy our seasonal bounty of tomatoes and cucumbers.

Are you overwhelmed with too many tomatoes and cucumbers? Gazpacho is the answer to late summer bounty. Gazpacho is traditionally served cold which is nice during the hot days of summer. There are many Gazpacho recipes; most are made with fresh, seasonal ingredients. Use the seasonal ingredients found in your garden or at the Kamloops Farmer’s Market. Experiment!

1 large garden sweet onion, chopped
1 large garden garlic clove, chopped
1/2c garden parsley, chopped
1/4c garden basil, chopped
1 hot pepper (optional)
1-2tsp sea salt
6-8 large tomatoes, chopped
6-8 large cucumbers, chopped
1/2c organic extra-virgin olive oil
In a food processor, finely chop the onion, garlic, parsley, hot pepper and sea salt. Move this mixture into a large bowl. In the empty food processor, puree the tomatoes. Add the tomatoes to the large bowl. In the food processor, finely chop the cucumbers. Add the olive oil and mix everything together well. Add more sea salt, herbs or spice to taste. Chill and serve.

gazpacho-salsa

Gazpacho can be used like salsa on burgers.

gazpacho-kale chips

Gazpacho makes a good “salsa” and kale chips are a good substitute for “corn chips”. These make wonderful seasonal snack foods that can be found in your garden.

Here is the recipe for Crunchy Kale Chips.

Harvest Bounty and Traditional Fermentation: Photo Essay

harvest-bounty-1

October is the last month of operation for the Kamloops Farmer's Market. At this time of year, there is a bounty of produce. If you are going to make fermented foods you need all your ingredients to be organic or not sprayed. Sprayed vegetables will kill the fermentation process.

Before canning, people fermented to preserve food. Fermenting foods can store the harvest bounty for later consumption during the winter months. Fermentation also increases the nutrient content of the base food. Fermented foods are alive and full of probiotics that can help improve our gut health and immune function. This is especially important during the cold winter months.

Traditional fermentation requires a crock, or you can always make smaller amounts using a glass mason jar or a Pickl-It. Here is a recipe for a making kimchi, our family’s favorite fermented vegetable. Below is a photo essay on how to make larger amounts of kimchi using two types of traditional fermentation crocks.

harvest-bounty-2

Over the summer my crocks sit empty, waiting for the harvest bounty. I have five crocks of different sizes. I can produce about 55L of fermented foods. I have three standard crocks like the ones in the middle. The two dark colored crocks are Harsch Gairtopf crocks.

The most difficult part about making large qualities of fermented foods is finding a container big enough to mix all the ingredients. I have four pails for chopped cabbage and one pail for all the spicy vegetables. As I load up the pressing crock, I mix about four parts chopped cabbage to one part spicy vegetables. As I am filling the pressing crock, I add the sea salt to each load of cabbage and spicy vegetables. I fill the crock up to the top and press the vegetables down until the liquid comes out. Normally, the crock will be half full after pressing. I will refill the crock to the top and do a second press before transferring the pressed kimchi and liquid to the smaller crocks. It is best to press, not pound, the kimchi. If I get tired I just take a break and the sea salt will do most of the work for me.

harvest-bounty-3

I mix four parts chopped cabbage and one part spicy vegetables in my largest crock and do all my pressing in that crock. I add the sea salt to each load of chopped cabbage and spicy vegetables. I find it easier to press the kimchi after laying whole cabbage leaves on top.

harvest-bounty-4

After the kimchi is compressed, the liquid will come out of the vegetables. At this point I transfer the kimchi into two smaller crocks and compress the kimchi again. I am always surprised how much produce goes into each crock.

harvest-bounty-5

This is what the kimchi looks like just before I put whole cabbage leaves on the top. The leaves help keep the small pieces of kimchi from floating to the surface. Anything on the surface will rot.

harvest-bounty-6

On top of the cabbage leaves go the "stones" which weigh down the kimchi. Anything that is floating on the surface must be removed to avoid rot. I will remove all these pieces and carefully clean the top of the crock before closing up the crock.

After all the floating pieces are removed, I put the lid on the crock and pour water around the lid to air-lock the crock. It is important to remember to add more water as it is lost to evaporation. I made 30L of kimchi in three crocks from about 80 pounds of cabbage and 20 pounds of assorted spicy vegetables. This might seem like a lot of kimchi for a family of four, but I try to encourage my family to eat a small amount of kimchi with each meal to improve digestion.

crock-day-4

This is a Harsch Gairtopf crock after four days of fermentation. Note, the airy bubbles on top. It is a good idea to label your crocks with a start date. After about 7-14 days I will move the crocks from my warm kitchen to a cool place for the winter. This will slow down the fermentation process.

crock-day-4b

Here is a standard crock with a glass plate and two granite stones to weigh down the kimchi. The ceramic lid broke on this crock so Shaen made me a wooden lid.

Harvest Bounty Canning: White Peaches

canning-rhonda-sonja

Rhonda Dieni came over to give my girls a basic canning lesson. We canned 50 pounds of organic white peaches.

My husband loves canned peaches. So last week we bought three cases of organic white peaches from Benchland/Todd Orchards, Keremeos, BC at the Saturday Kamloops Farmer’s Market. The peaches were so delicious we ate one case before canning day!

Rhonda Dieni came over to give my girls a basic canning lesson. My girls are home schooled and canning is a great skill for anyone to learn. Rhonda has been canning all her life. She gives canning lessons at the Kamloops Community Kitchen. Before Rhonda arrived I washed and dried twenty, 1L glass mason jars. I found twenty lids and caps. I cleaned up my counters and removed the tablecloth from the dinning room table.

I have never canned before so Rhonda brought her canning equipment and set up in our kitchen. She has two traditional canning pots with trivets for removing the hot jars. While we peeled, Rhonda made a hot syrup for pouring over the peeled peaches. She prefers to use less sweetener in her syrup but warns that if we don’t use any sweetener the peaches would discolor. Here is Rhonda’s hot syrup recipe:

Hot Syrup for Peaches
16c water
1c local honey

The rest of us stood around the dinning room table and peeled fifty pounds of peaches. We peeled and pitted the peaches and cut the peaches into eighths. We saved all the pits and peels for our hogs. The peach pieces went right into the jars. Rhonda told us to lightly push down the pieces, without crushing, to better fill the jars. With four of us working at peeling, it took less than two hours. Actually, it was really fun to stand around the table peeling, laughing and talking. I feel like everyone should have this wonderful experience!

canning-clean-tops

It is very important to ensure the tops of the canning jars are clean before putting on the lids.

While we peeled, Rhonda poured the hot syrup over the peaches and carefully cleaned the top of the jars before setting the lids on the jars. The first load of jars was ready to go into the hot water bath. Thirty minutes later Rhonda removed the jars and set them to cool on the counter protected by a tea towel to sop up sticky juice. Each load did ten jars.

canning-fresh-canned

Here is one fresh organic white peach. In the background are the canned peaches just out of the water bath.

Rhonda said to let the jars sit overnight on the counter, if possible, before moving the jars into storage. This lets the jars set. Rhonda said it was a tradition in her family to not eat any canned foods until after the US Thanksgiving Holiday. This tradition ensures that the family would eat fresh foods during the bounty of fall and save the canned foods for the cold, dark days of winter. I think this is a smart tradition and my family will follow it.

Rhonda Dieni gives canning instruction every second Thursday for the Kamloops Community Kitchen. This would be an excellent course for home schooled young adults or anyone interested in learning how to can. Rhonda is also organizing the First Annual Food Swap on October 17, 2012 at 6:00 to 8:00pm. Please contact Rhonda at 778.470.4442 for more information and to preregister, as space will be limited.

canning-cooled-peaches

Here are the canned peaches after they have cooled and set. I removed the metal collars and washed the sticky juice off the jars. The collars are not needed and can be difficult to remove later.

Kamloops Farmer’s Market: Photo Essay

silver-springs-organic-1

Come for a walk with me at the Kamloops Farmer's Market. I like going on Wednesdays because I can go to the library while picking up wonderful local food. Here is the booth for Silver Springs Organic.

There are two Kamloops Farmer’s Markets. One market is on Wednesdays and another market is on Saturdays:

Wednesdays
Time: 8:00am to 2:00pm
When: Wednesdays between May 2 to October 31, 2012
Where: 400 block Victoria St, Kamloops, BC

Saturdays
Time: 8:00am to 12:00noon
When: Saturdays between April 21 to October 27, 2012
Where: 200 block of St Paul St, Kamloops, BC

beets-chard-2

I don't know everyone at the market yet. Over the years I have met more and more farmers. I don't know why, but I feel more connected when I know where my food comes from.

My favorite farmer’s market is on Wednesdays because it fits into my working schedule. I can go to the library and stock up on my weekly vegetables at the same time. I like doing as many chores as I can for each trip down the hill. This saves me time and money.

The Kamloops Farmer’s Market has really changed my buying patterns. I used to buy everything from the grocery store but the quality and freshness of the market food changed all that. The market got me thinking about local food and about eating seasonally. The market even started me growing my own food. I don’t know how that happened but it did. I love the bustle of the market and all the people gathering around for the great food. It’s like a weekly block party!

If you have never been to the Kamloops Farmer’s Market come down and enjoy the fun!

fresh-is-best-salsa-company-3

This is the booth for Fresh is Best Salsa Company. They are a homegrown Kamloops business. They make a whole line of ready to eat salsa, sauces and snacks: www.freshisbest.ca.

thistle-farm-4

This is the Thistle Farm's booth. Dieter Dudy was within 500 votes of becoming our new major. Thistle Farm has an organic produce delivery box for people that can't make it to the market: www.thistlefarm.com.

beets-carrots-onions-5

Here are some beautiful beets, carrots and onions. It's wonderful to see so many happy faces at the market. One thing I have learned at the market is to enjoy the seasonal bounty.

beets-radishes-potatoes-6

After I started eating produce in season, I couldn't go back. There is nothing better than new potatoes, just out of the ground. Waiting for the first hot pepper, carrot, tomato or strawberry of the year becomes part of the pleasure of real food.

golden-ears-farm-7

Here is Anne Grube working at the booth for Golden Ears Farm. She has just received a community works award from the Council of Canadians. Look at those tomatoes, cucumbers and beans. Golden Ears Farm has a fruit stand near Chase, BC: www.goldenearsfarm.org.

caesar-thumb-down-ajax-8

Here is the Kamloops Area Preservation Association giving a Caesar's thumb-down to the Ajax Mine. The market is a great place to find out what's on people's minds: www.stopajaxmine.ca.

library-square-workers-backs-9

I hope you enjoyed the tour of the market. I will leave you in library square. In 2003, the Thompson Nicola District experienced terrible wildfires. The sculpture in the background remembers the efforts of firefighters, emergency workers, volunteers and evacuees.