Indoor Growing Unit: Photo Essay

homegrown-greens

Sprouts are ready within a week. Sunflower and pea sprouts are ready within two weeks and microgreens take three weeks. Homegrown greens are a great way to save money.

Last year when the price of organic greens continued to climb, we decided to start growing our own indoor greens. This project was so successful that we wanted to do it again this year but we had some design problems with last year’s growing unit. While I organized my seed collection for sprouting and microgreens, my husband rebuilt the growing unit with the sprouting area above the ballasts to make use of the waste heat.

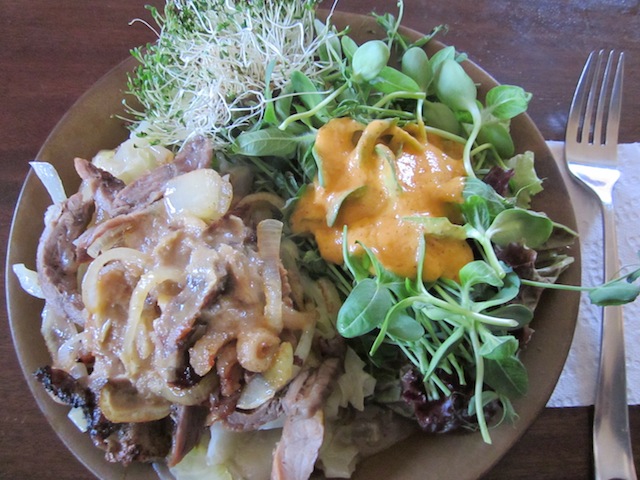
The goal this year is to produce enough sprouts and microgreens to satisfy our household. In our household, that’s about four large salads each day. Any waste production goes to the chickens or can be composted. We will still be getting organic root vegetables from the root cellar and local farmers. Exotic items from Nature’s Fare are still on the menu but growing greens at home really does save money and adds to our household food security.

grow-unit-1a

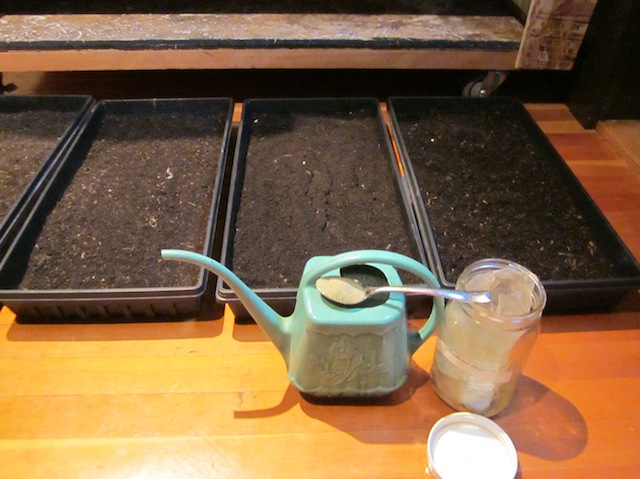
The first step is to get the sprouting system going. The mason jar on the left is for sprouting sunflower seeds and peas. These seeds need to be soaked and rinsed for 2-3 days until they sprout. Then the seeds will be planted into trays and go into the growing unit.

On day one, I start the sprouting system. On the right, is the standard layered sprouting unit. I fill the unit with alfalfa seeds and my homemade sprouting mix. The sprouting mix has: 1 part organic broccoli seeds, 1 part organic fenugreek seeds (optional), 1 part organic radish seeds and 3 parts organic French green lentils. In the center, is a unit for making pressure method mung beans. These sprouts will be eaten fresh in a salad or stir-fry.

On the left, is a mason jar with a screen-top for rinsing the seeds. These seeds will be used in the growing unit. After experimenting, I prefer sprouting sunflowers seeds and peas. These seeds need to be soaked and then rinsed for 2-3 days before planting. I wait until I can see the radicle (tiny sprout) before planting in the tray. Sprouting before planting avoids wasting time planting nonviable seeds.

grow-unit-1

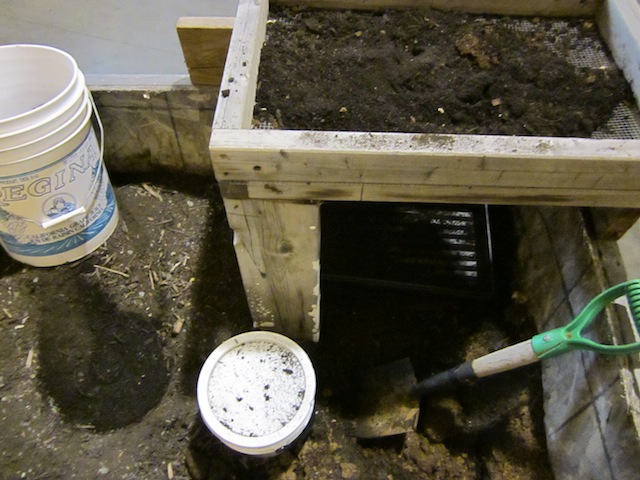
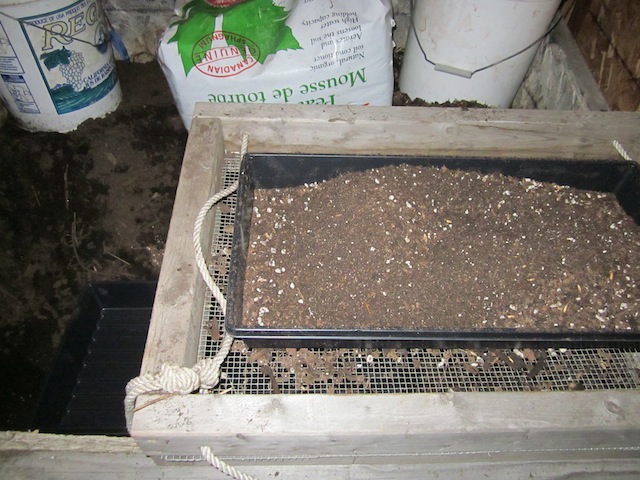
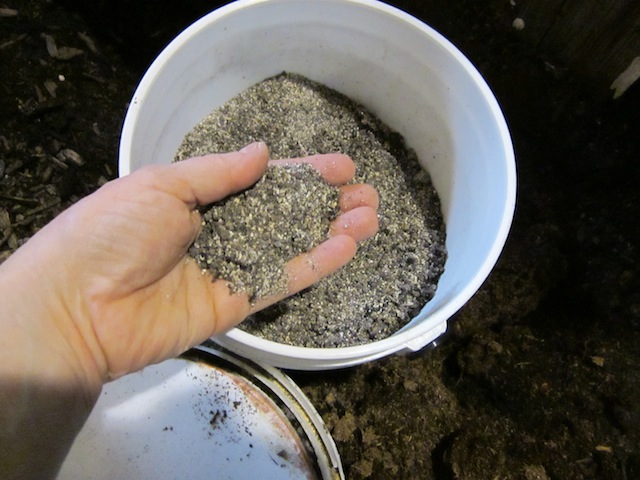
Day one is also for getting the trays ready for planting. This is the soil preparation box. It’s better to keep the soil indoors to avoid freezing.

The soil preparation box is filled with garden soil and compost. I add a small amount of peat to the mix before sifting the soil into the trays. You could miss this whole step if you decide to buy potting mix but buying soil is more expensive.

grow-unit-2

This is my homemade organic fertilizer. The recipe is: 1 part blood meal, 1 part bone meal and 1 part lime. This fertilizer is not needed if you have rich soil, compost or worm casings.

grow-unit-3

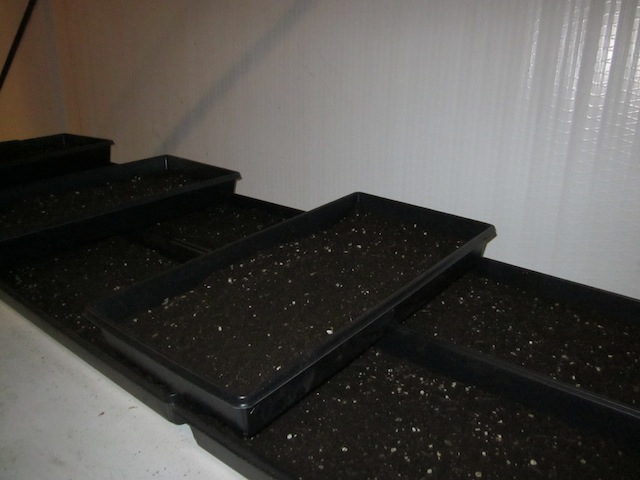
I half fill the trays with soil when I’m planning to grow sunflowers or peas. Microgreens take longer to grow so I add a bit more soil and some homemade organic fertilizer, if needed.

If I do add homemade organic fertilizer, I add it to some of the soil at the bottom of the flat and put more soil on top. This avoids burning the young plants. Don’t add fertilizer if you have access to rich soil, compost or worm casings.

grow-unit-4

I let the soil warm up in the house overnight before planting. I water each tray very well. I try to water with room temperature water. For the first watering, I add 1tsp powdered kelp to each liter of water. The kelp has micro-nutrients that will be taken up by the young plants.

mesclun-mustard-14

On day two after the soil warms up overnight, I plant the microgreens in one tray. I make some holes with my finger and plant one or two seeds in each hole. The goal is one seed per hole. I don’t get concerned if more go in. These seeds go straight into the soil without soaking.

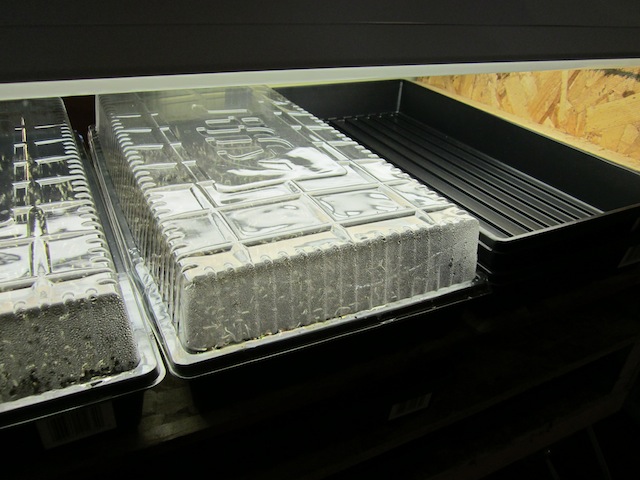
I use West Coast Seed: Mustard Blend and Nicoise Mesclun Blend but there are many great blends. After planting the seeds, I water one more time. I cover the tray with an upside-down tray. This stops moisture from leaving the tray. I will leave the tray in the dark for 2-3 days. When the seeds have rooted well, I remove the tray top and put on a plastic greenhouse top and then turn on the lights.

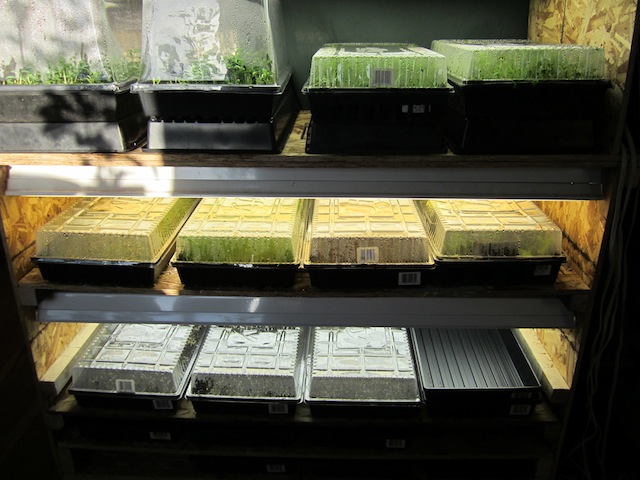
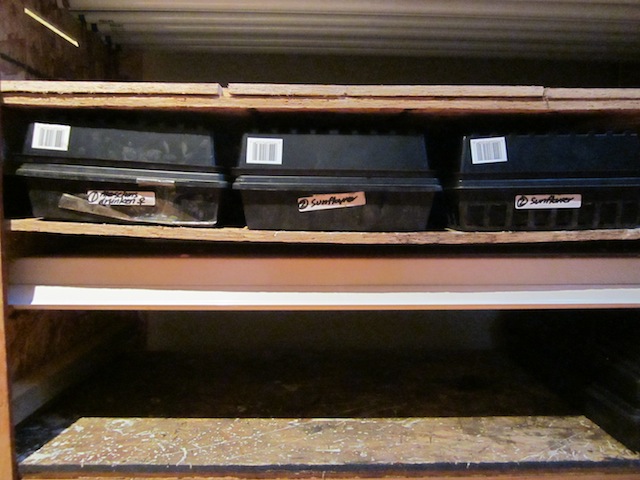
Remember to label the trays with the date and what has been planted. I sometimes forget to do this and always regret it. The goal is to fill one tray each day. In our growing unit there are twelve trays so it should take about twelve days to load up the indoor growing unit.

sunflower-sprouts-8

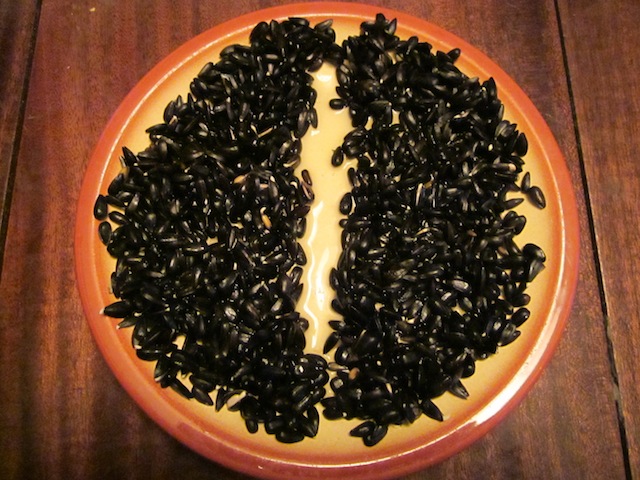
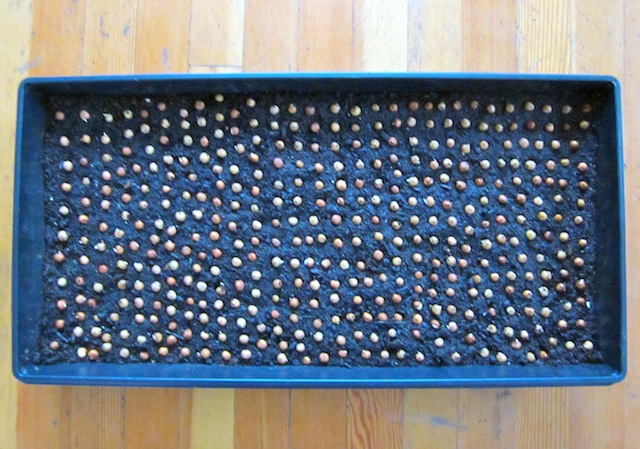
On day three, I get the sunflower seeds ready for planting. If I haven’t already done so, I remove any broken or damaged seeds which can rot in the tray. I only plant viable seeds.

I did a typical mistake and sprouted too many sunflowers seeds. I could have given the extra seeds to the chickens. I decided to plant two trays. This won’t be a problem this early in the loading process.

sunflower-tray-9

I water the trays one last time. I spread the sunflower seeds carefully on the soil. The goal is to not have the seeds touch each other because they sometimes rot. I lightly press the sunflower seeds into the soil with the flat of my hand.? Do NOT cover the sunflower seeds with soil because this makes harvesting more difficult.

sunflower-covered-10

I cover the planted tray with an upside-down tray and put the seeds in a warm, dark place. When I see good root growth, I will move these trays to the light area just below. I will remove the dark top and put on a plastic greenhouse top and then turn on the lights.

On day three, I loaded up one tray with Nicoise Mesclun Blend. I make some holes with my finger and plant one or two seeds in each hole. After planting, I give the seeds one more water. I cover the tray with an upside-down tray. This stops moisture from leaving the tray. I will leave the tray in the dark for 2-3 days then remove the dark top and replace it with a plastic greenhouse top and move the tray into the light.

spotted-peas-12

On day four, I filled a tray with sprouted, spotted peas. I carefully pushed the seeds into the soil. I only planted the viable seeds. The soil was very wet so I didn’t water.

move-light-13

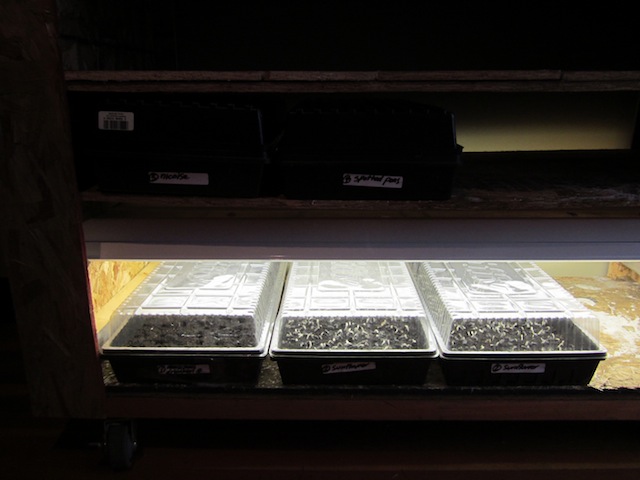
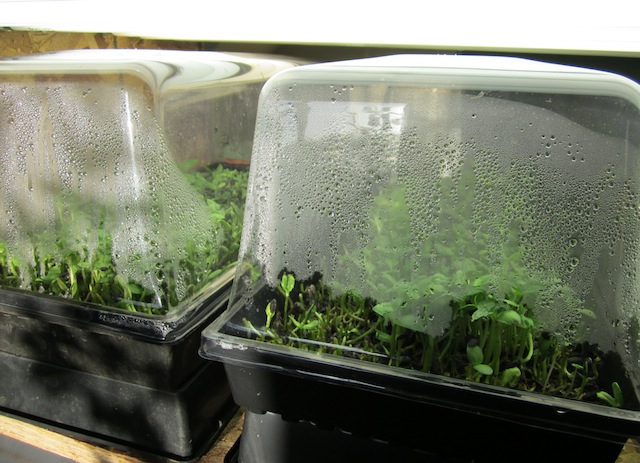
On day four, the first three trays are ready to be moved into the light. I remove the dark covers and replace them with plastic greenhouse covers. It’s very important to sit the covers well to avoid moisture escaping the trays.

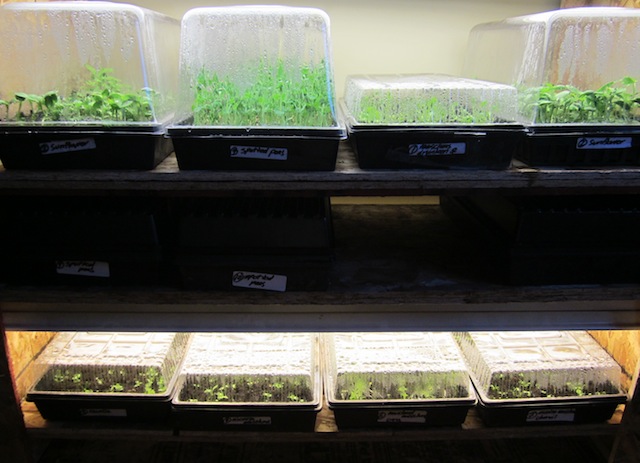
I will continue to fill the growing unit with one new tray every day. I rotate through: Mustard Blend, black seed-oil sunflowers,? Nicoise Mesclun Blend, spotted peas and repeat. The sunflower and pea sprouts will be ready first followed by the microgreens a week later.

growing-unit-day-10

By day ten, eleven trays are full. Nine trays are under the lights and two trays are in the dark. The sunflower and pea sprouts are ready to be harvested.

chicken-greens-14

My family has been eating out of these trays for two days. I will get one more meal of salad greens from these trays. Then the trays will go to the chickens. The chickens enjoy eating the greens, seeds and roots especially during the winter when there isn’t any forage.

The sunflower and pea sprouts are ready to harvest first. I use scissors to cut the stems close to the level of the soil. The microgreens will need another week to grow before harvesting. There is a bit of mold in the left tray. I used to remove any moldy plants, root and all. This is not necessary and seems to spread the mold and stresses the other plants. I have found it’s easier to harvest any moldy plants and discard.

After the growing unit is full and depending on my family’s consumption of greens, I tend to start a new tray every 2-4 days. I continue to rotate through the four types of seeds. I hope this post was helpful in starting your own indoor homegrown greens! Merry Christmas and Happy New Year!

dec-10-2015-microgreens

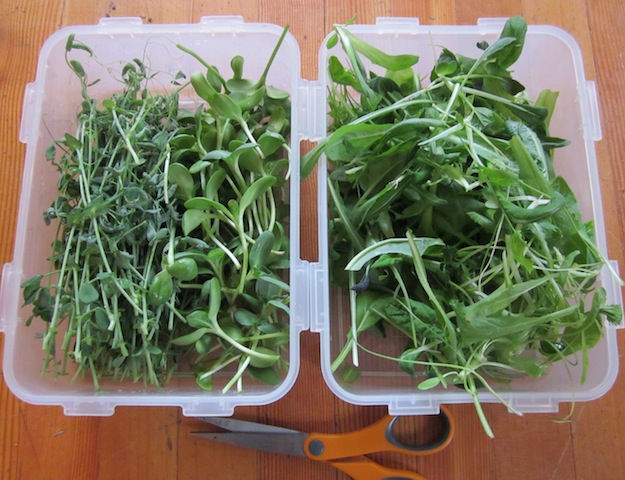
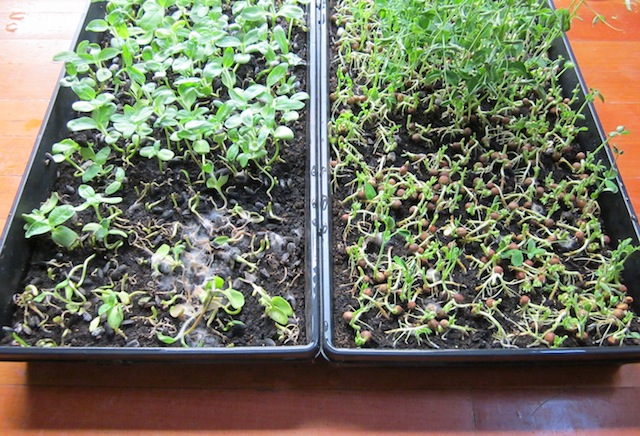
On the left is spotted peas and sunflower sprouts. On the right is an assortment of eleven microgreens: arugula, curled endive, curly cress, cutting chicory, dandelion, green onions, mizuna, red komatsuna, giant red mustard and two types of pac choi.

?

Seasonal Foods: Microgreens and Indoor Gardening

microgreens-1a

One or two more days until harvest time! Under the best conditions the outside garden will start producing a harvest in 60 days. With an indoor garden, the first harvest happens in 10-14 days.

This winter as the price of organic vegetables started to climb and the contents in my root cellar started to dwindle, I started sprouting. I had a series of mason jars lining my kitchen window but the production just wasn’t enough. I bought a new sprout stacking tray but it still didn’t meet my needs. I started bulk production of mung beans but there still wasn’t enough! I realized with a family of four including two teenagers, I would have to get serious about my production.

I started looking around the internet for household or commercial growing units. I found many great units but the cost was around $500 for a household system to $4000 for a small commercial system. The cheaper units were dry. The more expensive units were automatic, wet systems with complicated plumbing, draining, misting, and timers with complex, computerized, electrical systems. To me, it looked like a lot of systems to go wrong. Being frugal, I knew we would be building our own simple, dry growing unit, likely out of scarp materials and spare parts.

It took Shaen about four hours to build the dry growing unit to accommodate a standard 10″x21″ seedling tray out of scrap materials. The growing unit was built around the a 4′ long fluorescent light and can accommodate a total of 20 seedling trays. There are five shelves with three shelves with lights. Each shelf with lights has four double fluorescent lights with a total of eight bulbs per shelf. The growing unit is on wheels and can be moved around easily. The unit is covered with a piece of reused, lumber wrap but an old cotton sheet would work well too. Being a dry system, it is important to use seedling trays that DO NOT have holes in the bottom. The unit is still not perfect but like with most of our projects, it’s good enough!

microgreens-1

Growing microgreens will require some equipment and materials. Gather together the seedling trays, soil sieve, peat moss, compost, garden soil and additives. If you don’t have the time to mix your own soil, an easier solution is buying seedling soil or potting soil.

microgreens-2

The peat moss, compost and garden soil is put through the sieve to remove any large pieces. The no-hole seedling trays are half filled. Now is the time to add dry organic fertilizers, if desired.

microgreens-3

Filling a number of seedling trays with the soil mixture will save time.

The idea with the growing unit is that sprouting happens in the dark shelves close to the floor. In our situation, the house is heated with in-floor heating so sprouting works best closer to the floor. As the sprouts grow they are moved up to the light shelves. Later, we wondered if we had got it backwards. Even though fluorescent lights do not produce much heat, the ballasts do produce heat. Under normal circumstances it would be better to have the sprouting shelves above the light shelves to make use of the waste heat from the ballasts. If we build this growing unit again, we would put the dark shelves above the ballasts.

This growing unit is designed to be dry. It is very important to use seedling trays that do not have holes in the bottom. Handle the trays gently to avoid damage because leaky trays cannot be used. Fill half of each tray with sifted compost, peat moss and garden soil. During my research, many sources recommended using 50% compost, 25% peat moss and 25% garden soil. Personally, I will be experimenting with soil mixtures and natural additives but I started with this ratio. To avoid extra work, load 4-12 trays with sifted soil at a time. Dampen the soil in each tray and cover the tray with another seedling tray to keep the soil from drying out.

microgreens-4

This is our mobile growing unit. There are three light shelves and two dark shelves. If we build this growing unit again we would put the dark shelves above the light ballasts.

microgreens-5

On the right is a tray with seedling that are rooting. The second tray on top is to keep the seedlings in the dark. When the seedlings have rooted the plastic greenhouse top goes on.

The seeds are soaked and sprouted in mason jars for anywhere from 1-3 days depending on the type of seed. (If you have never sprouted in mason jars please see Pantry Foods: Sprouts.) With fresh water, rinse and drain the seeds two or three times a day. I do not plant the seeds until I see some evidence of sprouting. I usually fill one tray per day with soaked seeds. For each tray, soak the following amount of dried seeds:
1/2c organic unhulled sunflower seeds,?unhulled buckwheat seeds or whole garden peas
1/4c microgreen mix (whole unhulled seeds: fenugreek, dill, coriander, brown mustard, yellow mustard, radish, broccoli, cress, chicory, kale, rapine, lettuce, dandelion, amaranth, lentils, peas, etc.)

If you are new to microgreens, start with sunflower, peas and buckwheat seeds which are fast and easy to grow. The peas and buckwheat are better cooked like spinach while the sunflower sprouts are better raw. There are commercial microgreen mixtures which I have never used. I mixed up my own blend with the seeds I have available. For the bulk of sprouting I use beans, legumes and seeds from my dried stores. For variety, I add culinary seeds and old garden seeds to the mix. In general, if your microgreen mix has more small seeds use less volume, and if it has more large seeds use more volume.

When the seeds in the mason jar show signs of sprouting it is time to plant. Spread the seeds evenly over the soil in the tray. Try not to have the seeds touch each other. There is no need to cover the seeds with soil. Using the flat of your hand, gently press the seeds into the soil, if desired. Water the seeds and cover the seeds with another seedling tray. Some growers recommend adding a small amount of dried powdered kelp to the first watering. Some growers recommend a mixture of blood meal, bone meal, lime and kelp to be mixed into the soil before planting. I’m experimenting with both methods to see which additives work best in a given situation.

In 1-3 days, the seedlings will be rooted and pushing up on the top seedling tray. This is the time to move the young seedlings into the light and to cover the tray with a plastic greenhouse cover. The plastic greenhouse cover does a good job of keeping the sprouts moist. If you do need to water, just moisten the soil. Don’t over water the plants. Be careful to not damage the plastic greenhouse covers. Damaged covers do not protect the sprouts from moisture loss and will require more care and watering.

Within a 6-10 days the microgreens will be ready to cut.? A sharp knife or scissors work well to cut the microgreens close the level of the soil. It’s best to cut just before eating the sprouts. First, cut around the edge of the tray and any really large sprouts. The remaining sprouts will close the gaps after just one day of growing. For the next cut, cut through the middle of the tray, followed by cutting in quarters then eighths. After all the greens are cut the soil and roots can be given to chickens or composted.

Once the growing unit is set up, it takes less than 10 minute each day to manage the system and provide your family with delicious fresh sprouts and microgreens! Also, producing bedding plants for your regular garden will be a breeze!

If you are looking for suppliers of seeds I have used The Horse Barn for industrial (seed-oil) sunflower seeds, Nature’s Fare for organic mung beans and Fieldstone Granary for organic beans, legumes and grains. In the past, I have used Mountain Rose Herbs for any type of organic sprouting seed and whole, organic culinary seeds. Recently, I have found a new source for organic sprouting seeds in Nelson, BC called Organic Matters. They have a excellent selection of organic sprouting seeds, beans, legumes and grains.

microgreens-6

Once the seedlings grow enough to push up on the small greenhouse cover, replace the cover with a larger one. If you get the watering right and don’t open the greenhouse cover very often, you will not have to water at all before harvesting.

Updated April 2, 2015: I said earlier I didn’t use commercial seed blends. Well, I’m a convert now. I have been successfully using Mescluns blends from West Coast Seeds. Excellent microgreens for starting indoors — and after thinning — for transplanting outdoors into cold frames.