Macadamia Candy

mac-candy-3

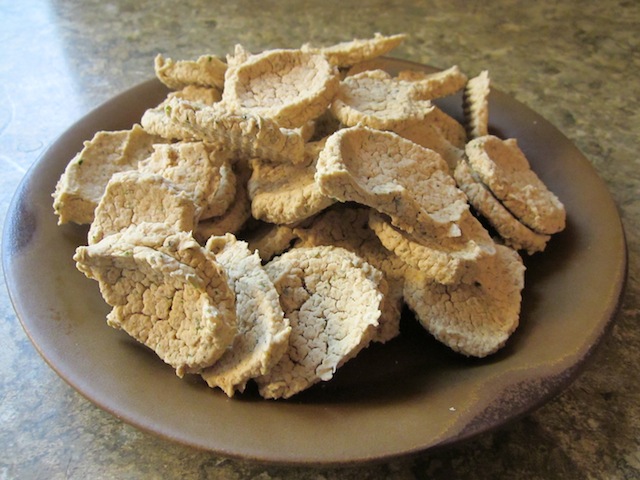
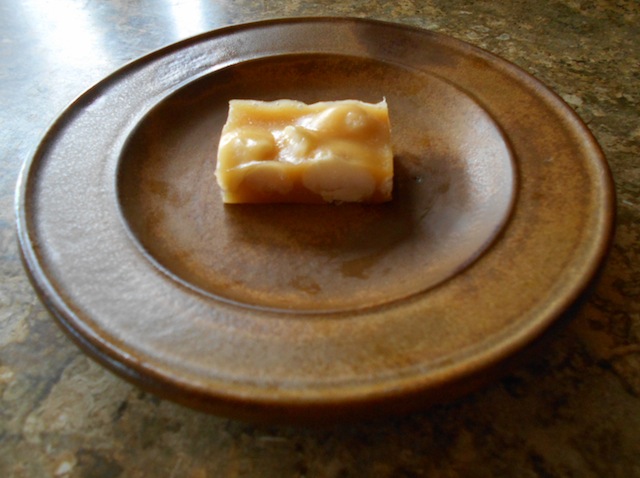
Macadamia Candy has a buttery flavor with a satisfying crunch, while not being too sweet. Warning: it’s hard to eat just one piece!

This recipe is safe for someone on the Specific Carbohydrate Diet or GAPS.

This recipe is a reworking of Walnut Chocolate Toffee using macadamia nuts. I had the good fortune of getting some macadamia nuts on a recent trip to Hawaii. If you are going to the Big Island, I would recommend going on a tour to Hamakua Macadamia Nut Company and bring back a big bag of macadamias!

mac-candy-1

Butter a piece of wax paper before pouring in the candy to avoid excessive sticking.

1/2c organic butter
1/4-1/3c local honey
1/2tsp sea salt
1T organic whipping cream
1T organic vanilla extract
1c organic macadamia nuts
As I’ve said before, making candy is a bit of a science and a bit of an art. Some people use the cooking time or temperature to decide if the candy is ready. Others use the color of the candy — that of a brown paper bag — to tell when the candy is ready. Another method is to drop a small amount of candy into a bowl of cold water and test the firmness of the candy between the thumb and forefinger. I find using the cooking time, the color of the candy and the water test (when in doubt) works best for me.

Butter a piece of wax paper and place it inside a 8″x8″ glass baking tray. In a sauce pan, warm the butter, honey and sea salt and bring to a boil. Stir all the time and boil for 7-8 minutes. This longer boiling time will result in a harder candy. Remove the candy from the heat and add the cream and vanilla extract and mix well. Be careful, the hot mixture will spit and foam up.

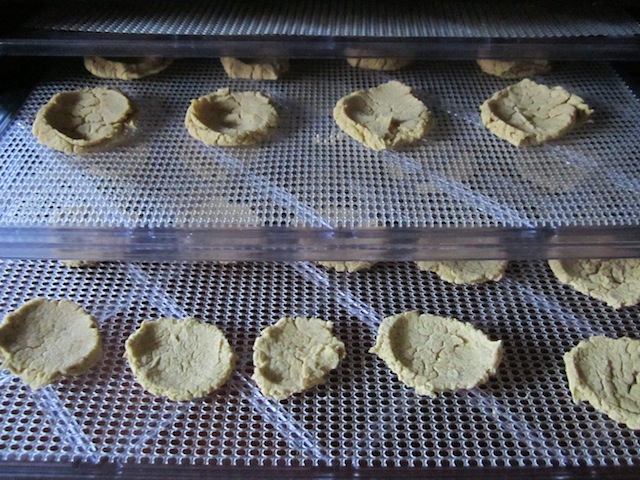
Stir in the macadamia nuts and quickly transfer the candy to a buttered, waxed paper. Made sure the candy is smooth and put the tray into the freezer. In about 10-15 minutes the candy will be ready to cut. Remove the wax paper and candy from the tray and place onto the counter for easier cutting. Cut into 32 pieces. Serve when completely cooled.

mac-candy-2

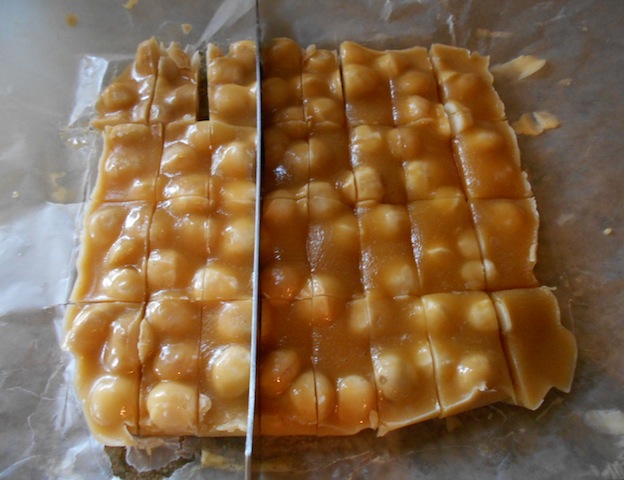
Remove the wax paper and candy from the glass tray before cutting. It’s easier to cut the candy before it has completely cooled.

Coco-Chia Pudding

“The reason Chia seeds are so beneficial is due to them being rich in fiber, omega-3 fats, protein, vitamins and minerals? Chia also contains essential fatty acids alpha-linolenic and linoleic acid, mucin, strontium, Vitamins A, B, E, and D, and minerals including sulphur, iron, iodine, magnesium, manganese, niacin, thiamine, and they are a rich source of anti-oxidants.”
9 Chia Seeds Benefits and Side Effects by Dr Josh Axe

chia-coco-puddling

A small amount of chia seeds go a long way. One tablespoon of chia seeds will make about one half cup of thick pudding, more if you like a thinner pudding.

This recipe is NOT safe for someone on the Specific Carbohydrate Diet.

Chia seeds (Salvia hispanica) are a traditional food in Central and South America but is considered a novelty food in North America. Recently, chia seeds have made a big splash in the alternative health community. Chia seeds are full of mucilage and polysaccharides which are not well tolerated by people on the SCD. If you have been on the SCD for some time and all your symptoms have resolved you might like to experiment with chia seeds and see if you can tolerate them.

This dessert is very easy to make and has the consistency of crunchy tapioca. One member of the family said the dessert tasted good but looked like frog spawn, so it might make a fun Halloween dessert for young children!

Chia seeds are a dense food which doesn’t take up much space, making chia seeds a very good candidate for camping or emergency rations.

Coco-Chia Pudding

1/2c organic chia seeds, soaked
3c filtered water
1/4-1/3c organic creamed coconut
1c boiling water
3-4T local honey
1T homemade vanilla extract
1/2tsp sea salt
Soak the chia seeds overnight in the water. Stir the soaking seeds a few times during the process. This avoids the chia seeds clumping together. In a sauce pan, boil one cup of water. Remove from the heat. In a blender, add the creamed coconut, honey, vanilla extract and sea salt and mix until smooth. Add the mixture to the soaked chia seeds and mix well. Store the pudding in the fridge. The pudding will continue to thicken every day. If you prefer a thinner pudding add another cup of water or boiling water with more creamed coconut.

Plumy Cranberry Sauce

plumy-cranberry-sauce-1

Adding local ingredients to a traditional recipe is a great way to develop unique regional flavors.

This recipe is safe for someone on the Specific Carbohydrate Diet, GAPS or the modified paleo diet.

This Thanksgiving I didn’t have enough cranberries to make enough sauce to satisfy my family. It looked like I was going to have to make a last minute trip to the grocery store. I’ve made it a habit to always look around the house for possible substitutes before jumping into the car. By thinking before acting, I save time and money.

Since we had a bumper crop of prune plums this year, finding interesting ways to use plums has become a priority. I knew plums produce a beautiful red color when cooked so I decided to try adding the plums to the cranberry sauce. Using plums we grow on the property means the cranberries we have to buy go further, which saves our family money.

Plumy Cranberry Sauce

1c garden prune plums, frozen
1c organic cranberries, frozen
2/3c filtered water
1/2tsp sea salt
1-2T raw local honey
In a sauce pan, simmer the plums, cranberries and sea salt in the filtered water for 20-30 minutes until the cranberries burst. Remove from the heat and allow the sauce to cool down. Add the honey one tablespoon at a time and stir very well. This is easier if the sauce is still warm. Be careful not to add too much honey. Chill before serving. This sauce goes well with turkey, chicken or pork.

plumy-cranberry-sauce-2

Using plums we grow on the property means the cranberries we have to buy go further which saves our family money.

Fragrant Ginger Snaps

fragrant-ginger-snaps-2

This recipe makes a soft, chewy cookie with a fragrant taste. Top the cookie with some honeyed ginger or dried fruit pieces.

This recipe is safe for someone on the SCD/GAPS program. Just eliminate the optional blackstrap molasses.

This recipe is based on Ginger Snaps from Living Cuisine: The Art and Spirit of Raw Foods by Renee Loux Underkoffler. Renee’s cookbook has an amazing section of raw desserts based on nuts and she has a special gift for balancing flavors with spicing.

Living Cuisine was a gift from my sister many years ago. I was new to the SCD/GAPS program at the time. I was frustrated because I had no recipes for making a birthday cake for my youngest daughter that was “SCD/GAPS legal”. After reading Renee’s book, I never had problems with making SCD/GAPS legal desserts again!

2c boiling filtered water
18-20 organic dates, soaked and pitted
1/4c organic ginger, freshly grated very finely
2tsp organic nutmeg, freshly grated very finely
1T organic cinnamon stick, freshly ground
1/2tsp organic whole cloves, freshly ground
1/2tsp sea salt
2T organic blackstrap molasses (optional)
2c organic white beans, soaked, cooked and rinsed
2T organic whole yellow flax, freshly ground
organic raisins or homemade Honeyed Ginger, topping (optional)

Soak the white beans overnight in filtered water. Rinse the beans well before covering with fresh water and cooking for 1-2 hours until very tender. Remove any scum or hard beans during the cooking. Rinse the cooked bean well in cool filtered water before using.

Place the dates in a bowl and pour the boiling water over them. Cover and let the dates soak for 20-30 minutes. While the dates are soaking, finely grate the ginger and nutmeg and freshly grind the cinnamon and cloves in a spice grinder. When the dates are cool remove the pits and put the pitted dates into a food processor.

In a food processor, blend the dates until very smooth. Add some date soaking water, if needed. Add all the spices, ginger, molasses and sea salt and mix very well. Add the cooked beans and process until very smooth. Add the ground flax seeds last and grind again very well. Refrigerate for a few hours until the dough thickens.

Drop the cookie dough onto the dehydrator sheets in teaspoon amounts. With a wet spoon lightly press down the cookie dough into a round shape. The trick with the cookies to have the cookie dough thick enough not to drip through the dehydrator screen. The cookies are nicer if not over-dried. This produces a moist, chewy cookie.

fragrant-ginger-snaps

Try topping the ginger snaps with raisins or small pieces of honeyed ginger. See the link for a recipe for homemade Honeyed Ginger.

Renee is a raw food vegan and she has developed some delicious nut-based desserts. The Weston A Price Foundation does not consider a vegan diet healthy. In contrast to this view, many WAPF health practitioners use short-term vegan diets for a cleanse. These practitioners just don’t think veganism a good diet for long-term use or if you are planning on have children. Regardless of the WAPF views on vegetarianism, Renee’s desserts are fabulous!

“The Foundation believes that strict vegetarianism (veganism) is detrimental to human health. Vegetarianism that includes eggs and raw (unpasteurized) dairy products, organic vegetables and fruits, properly prepared whole grains, legumes, and nuts, and excludes unfermented soy products and processed foods, can be a healthy option for some people.”
Weston A Price Foundation: Vegetarian Tour

Spicy Bean Chips

bean-cracker-salsa

Here’s a beanie chip topped with organic cheese, crock banana peppers and homemade salsa.

I just heard about a new snack food called beanitos. I found the ingredient list on the internet and went to work on a grain-free, additive-free version that can be made at home.

I used an old recipe for Spicy Bean Dip from the Moosewood Cookbook and added ground yellow flax seeds to hold the chips together. I put the chips into the dehydrator for the night. I made two versions, one with fresh lime juice and one without. I know I have a great recipe when my family are eating the chips right out of the dehydrator!

bean-chips-2

The bean chips are a bit delicate but have a nice crunchy, creamy texture with a spicy aftertaste.

4c soaked and cooked organic white beans
4T organic olive oil
1 large organic onion, chopped
4-6 cloves garlic, minced
2tsp sea salt
2tsp whole organic cumin seeds, freshly ground
1tsp whole organic peppercorns, freshly ground
1/2c garden parsley, chopped
2-4 pinches organic cayenne, to taste
1/2c yellow flax seeds, freshly ground
1/4c homemade banana peppers, minced (optional)
1 organic lime, freshly squeezed (optional)

Soak the white beans overnight in filtered water. Rinse the beans well before covering with fresh water and cooking for 1-2 hours until very tender. Remove any scum or hard beans during cooking. Rinse the cooked bean in filtered water.

Freshly grind all the spices and yellow flax in a spice grinder for best results. Saute the onions and sea salt in the olive oil until lightly browned. Remove from heat and add the garlic and cumin.

In a food processor, blend the onion mixture, parsley, cayenne, peppercorns, banana peppers and lime until smooth. Add the cooked beans and flax meal and mix well. Use a bit of extra water to get a smooth texture, if needed. The bean paste should be as thick as possible.

Drop the bean paste onto the dehydrator sheets using a teaspoon. With a wet spoon lightly press down the paste into a round shape. The bean chips dry very quickly in the dehydrator.

bean-crackers-test-1

This recipe can be used for making spicy bean chips which are a good travel food. If you don’t have time to dehydrate the chips just use the bean paste as a dip.