Head Cheese: Photo Essay

pig-head-14

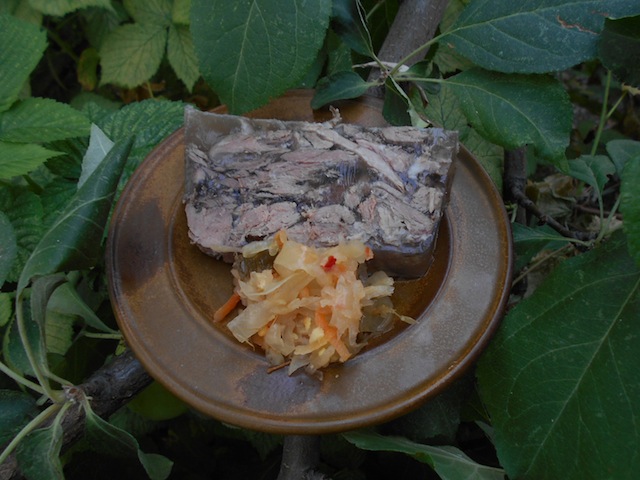
Head Cheese is easy to make and tastes wonderful with raw cheese or kimchi!

This recipe is safe for someone on the Specific Carbohydrate Diet or GAPS.

Head Cheese is easy to make but does require some time. Plan for one day to unfreeze the head, one night to brine the head and one day to cook and process.

Brine Solution
3/4c kosher salt
1/4c local honey
1/4c Himalayan pink salt
1-2 gallons filtered water

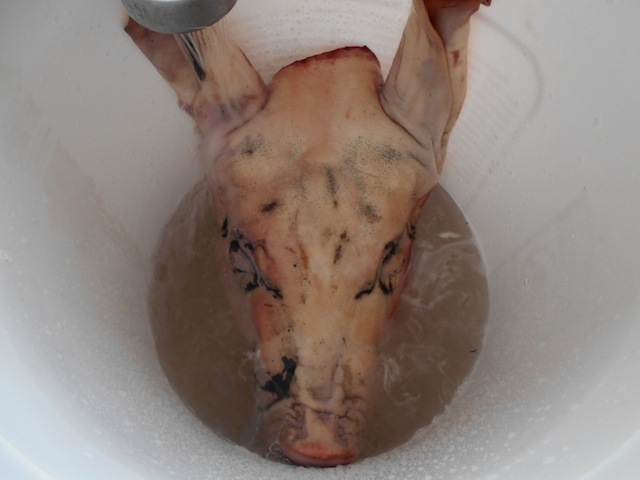
After the pig’s head has completely unfrozen, wash carefully and shave off any excessive hair. Soak the head in cold water for two hours. Mix up the brine solution. Use a small amount of boiling water to melt the honey and dissolve the salts. After two hours soaking in cold water, wash the head again and place the head in the brine solution. Add one to two gallons (or a bit more) of cold water to cover the head. Use a heavy plate to weigh down the head below the level of the brine solution. Leave the head in the brine solution for at least 8 hours or overnight. Remove the head and wash again. Discard the brine solution after use.

Broth
4 medium organic onions
2 organic celery ends
6-8 organic garlic cloves
1 bottle dry red wine
1 bunch garden parsley
1T organic thyme
2tsp organic black peppercorns
8 organic bay leaves
1tsp organic cloves
sea salt, to taste
1T Great Lakes Gelatin
2c warm broth
2T organic peppercorns, cracked (optional)

In a very large stock pot place the brined head with the vegetables, spices and wine. Add enough water to cover the head. Bring to a boil and reduce to a simmer for about four hours or until the jaw bone falls off. Remove the head and let cool. Carefully strain the broth and discard the spent vegetables and spices. Skim the broth of fat, if necessary. Add some sea salt to taste. Add one tablespoon of gelatin to some cold water and let sit for at least five minutes before addling to two cups of broth. This will ensure a firm jelly.

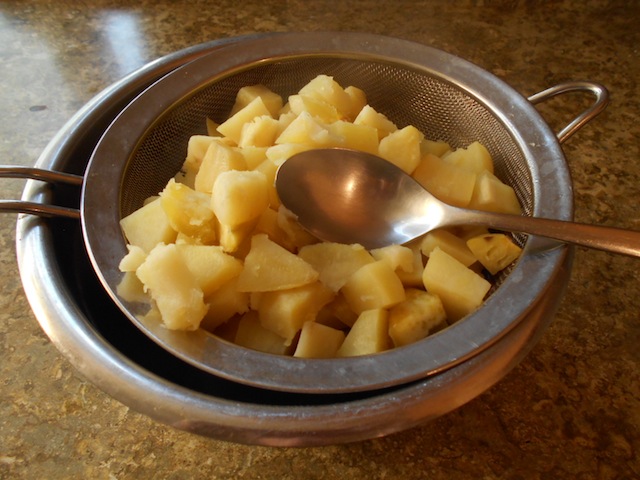
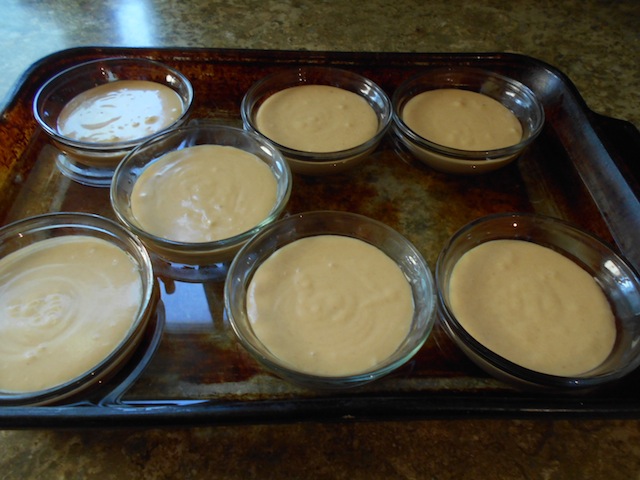
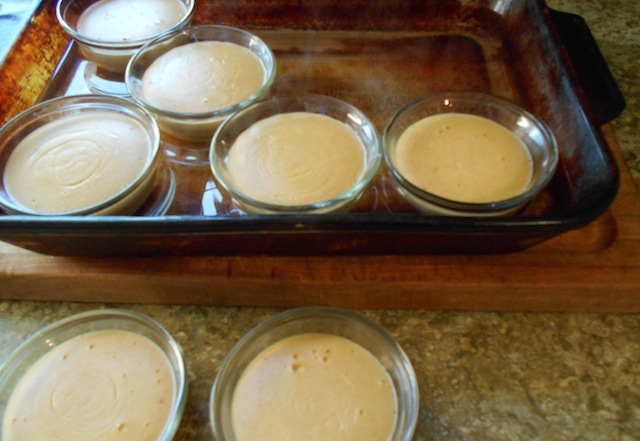
When the meat has cooled remove all the skin, fat, connective tissue and bones. (These remains make good pet food so freeze in appropriate portion sizes for your pet.) Coarsely cut or pull the meat into pieces. Place the meat into a terrine or glass baking tray. Press the meat down firmly before pouring on the broth. Reheat the broth if necessary to pour over the meat. Pour enough broth to cover the meat. Refrigerate overnight. After the gelatin has partly set up, add the optional cracked peppercorns to the top.

pig-head-1

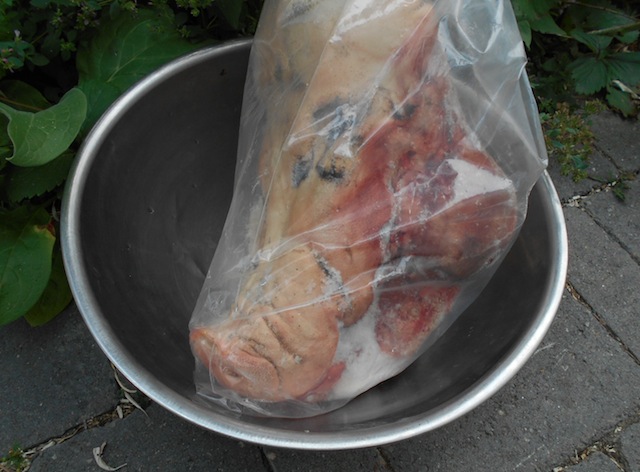
Give Piggy 24 hours to unfreeze before you start processing.

pig-head-2

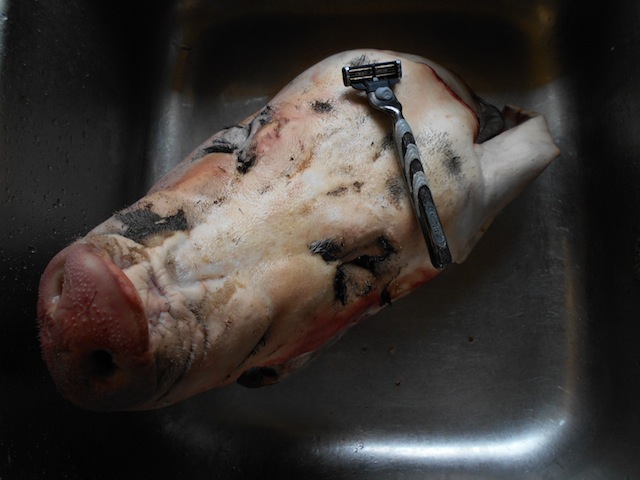
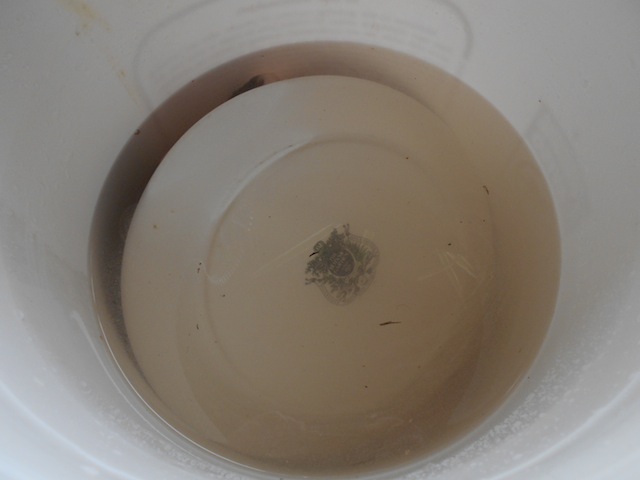
Piggy needed a good wash and a shave! Soak Piggy in some cold water for 2 hours, then wash again.

pig-head-3

Put Piggy into a food grade, 5 gallon pail with the brine solution.

pig-head-4

Place a plate on Piggy to keep him under the brine solution. Leave Piggy in the brine solution for at least 8 hours or overnight.

pig-head-9

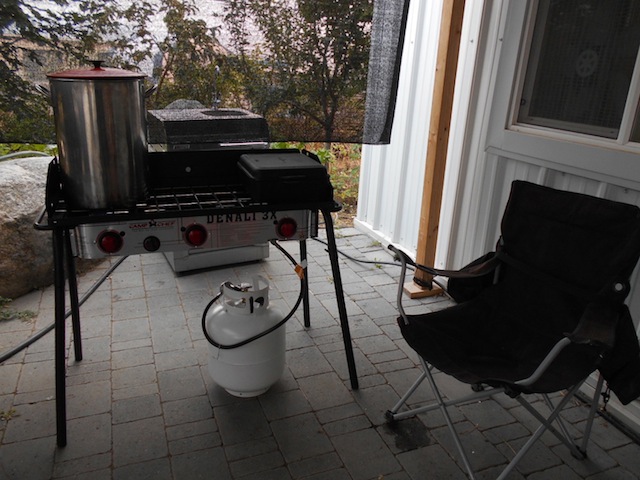
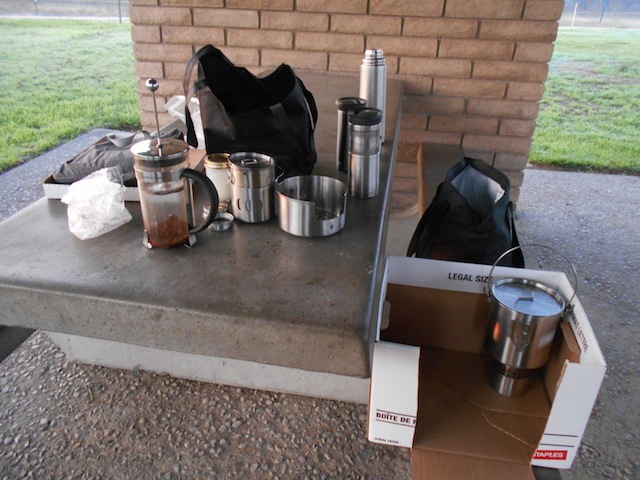
My husband got the portable cooker ready for use. We don’t like cooking in the house during the summer months. This helps keep the house cool without air-conditioning.

pig-head-6

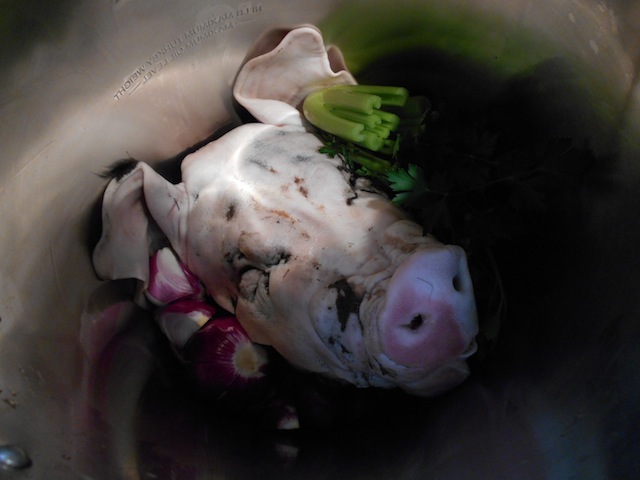
Piggy got a long rinse before being put in a very large pot with some vegetables, spices and red wine. Use just enough water to cover Piggy.

pig-head-7

I prefer to use a very heavy lid for long simmering.

pig-head-8

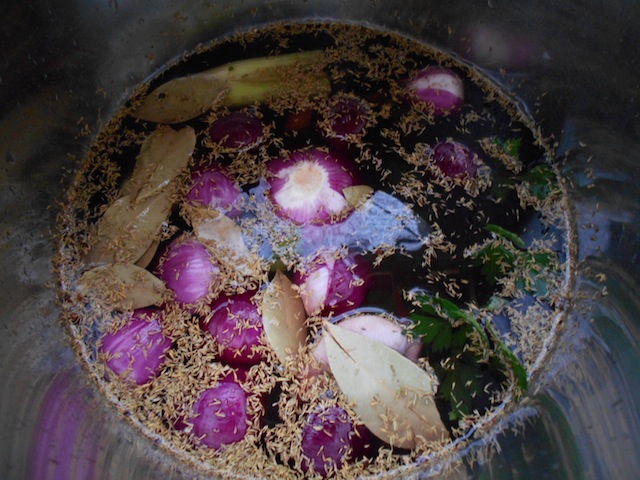
This is what the stock looks like just before the boiling point. Piggy needs to cook for about four hours or until his jaw falls off.

pig-head-10

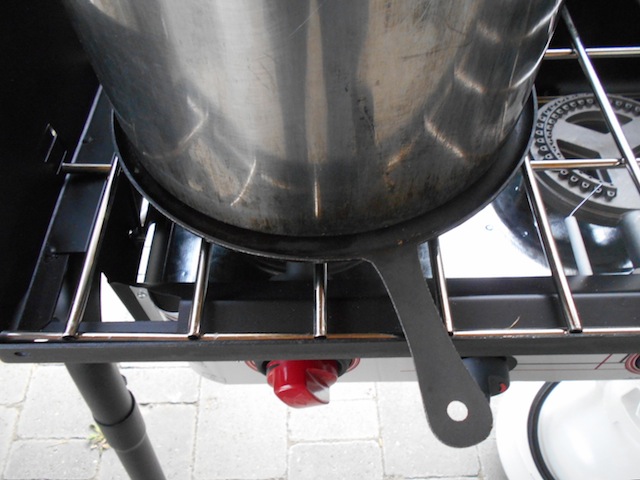
This isn’t a proper stock pot with a heavy bottom for long simmering. This pot was designed for deep frying turkeys. We use it for processing chickens for freezer camp. The bottom of the pot is very thin and I was concerned the meat might get scorched. I found a case iron crepe pan to work as protection for the bottom of the pot.

pig-head-11

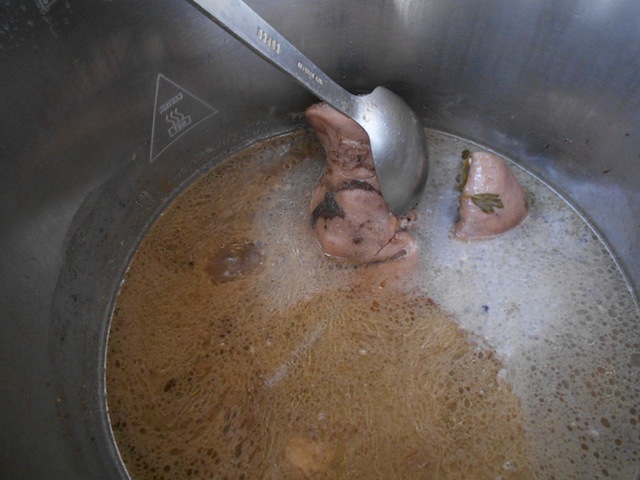
Piggy’s jaw didn’t fall off after four hours of cooking so I gave an extra hour. Piggy gave about 2 gallons of broth. I’m thinking the broth will make wonderful French Onion Soup and Wild Mushroom Soup.

pig-head-12

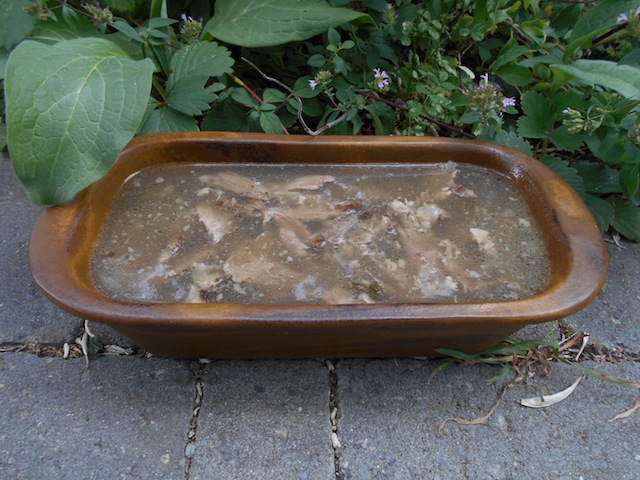
I cleaned the skin, fat, connective tissue and bone from the meat. I had enough meat for one bread pan. (Piggy’s cheeks had already been removed.) These discarded parts got portioned and put in the freezer for our warehouse cat. She will have many meals from Piggy’s remains.

pig-head-13

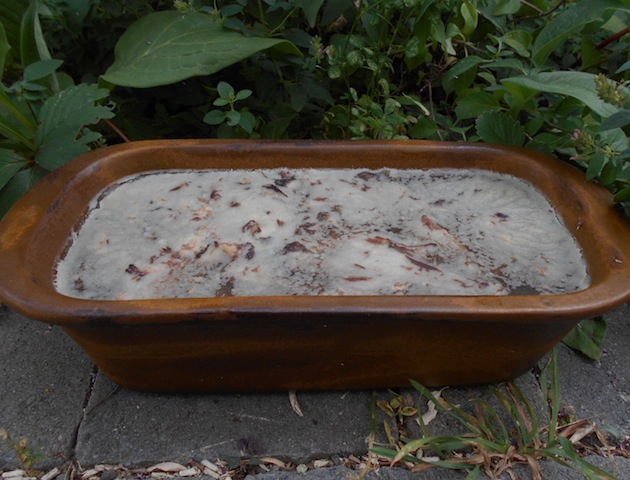
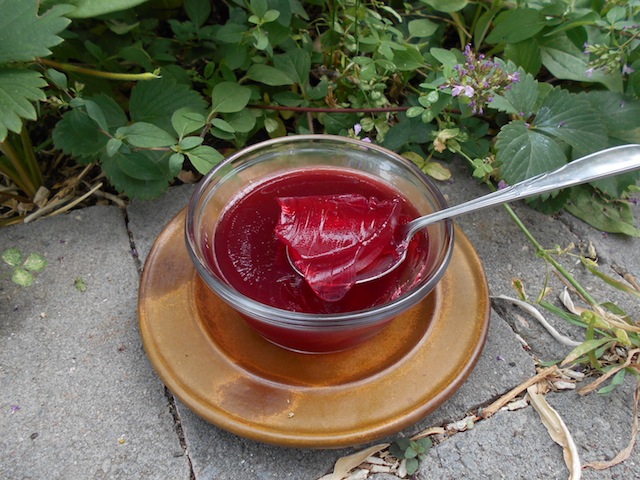
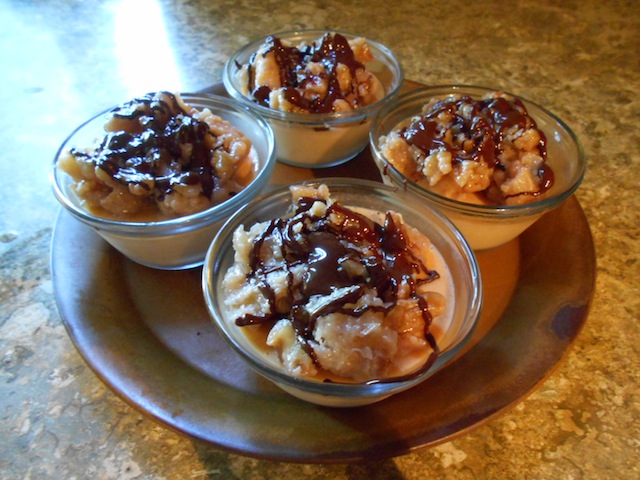
In the morning, the head cheese was ready! Next time I’ll add cracked peppercorns for the top!

Gelatine Jelly Dessert

gelatine-dessert

This gelatine dessert is made with a mixture of frozen plum, sour cherries and raspberries. Gelatine Dessert is refreshing on hot, summer days!

This recipe is safe for someone on the Specific Carbohydrate Diet or GAPS.

“It is always best to soak the gelatine first, and then stir it in a small saucepan by the side of the fire in a very small quantity of water until dissolved.”
Mrs Beeton’s Book of Household Management (1861)

Most of us know gelatine desserts by the modern brand name, Jello. Gelatine (or jellies) were once a very popular dessert but have fallen out of fashion. These desserts are very easy to make and are a good way to consume more gelatine while using up excessive, seasonal fruit. The trick to making a good jelly is to use one tablespoon of gelatin for every two cups of hot, fruit juice.

“Jellies may be described as solutions of gelatine in water, with wine, fruit and other additions, and their clear, brilliant transparency one of their chief recommendations.”

Gelatine Jelly Dessert

3c assorted seasonal fruit: raspberries, sour cherries and plums
3c filtered water
1 organic lemon peel, grated
1T local honey (optional)
3T Great Lakes Gelatin
In a small bowl, mix the gelatine with about 1/2c cold water and let the gelatine mixture sit for at least 5 minutes. In a large sauce pan, bring the seasonal fruit, lemon zest and water to a boil. Simmer for 20-30 minutes. Strain the cooked fruit through a sieve, lined with cheese cloth. Compost the fruit pulp and reserve the fruit juice. Add the honey and gelatine mixture to the hot fruit juice and stir well. Pour the juice mixture into small glass bowls. Refrigerate until firm. Serve the jelly desert cold.

“Calf’s foot jelly, which is stiffened by the gelatine extracted from the feet by boiling, has the advantage of being perfectly pure, but it is no more nourishing than the jelly made from bought gelatine. When nourishing jelly is required, it is better made from good veal stock.”

Sweet Potato Custard

sweet-potato-custard-5

Sweet Potato Custard is a very rich dessert with a complex, deep flavor.

This recipe is NOT safe for someone on the Specific Carbohydrate Diet or GAPS.

This recipe originally came from The Joy of Cooking. I’ve made some changes to the recipe. Even though it’s messy and a hassle, it’s necessary to put the cooked sweet potatoes through a sieve for a smooth custard.

sweet-potato-custard-1

Put the cooked sweet potatoes through a sieve for a smooth custard.

sweet-potato-custard-2

This recipe requires using a water bath for making the custard.

Sweet Potato Custard
1 1/2c organic sweet potatoes, peeled, cubed, and cooked
1/4c local honey
1/4c organic butter, cubed
1T homemade vanilla extract
4T organic lemon, juice
1tsp organic cinnamon, ground
1tsp organic nutmeg, freshly ground
1/2tsp sea salt
5 pastured eggs, whole
1c organic whipping cream

Peel about 4 cups of sweet potatoes and cut into small cubes. In a double boiler, stream the cubes for 20 minutes or until very soft. Force the well cooked sweet potato cubes through a sieve. You will need about 1.5 cups of sweet potatoes. Use the extra sweet potatoes for another meal. Preheat the oven to 325F. Get a large glass tray for the water bath and 6-8 glass bowls for the custard.

In a food processor, puree the sweet potatoes, honey, butter, vanilla extract, lemon juice, spices and salt until very smooth. Add one egg at a time, then add the whipping cream at the end.

Pour the mixture into 6-8 glass bowls. Place these glass bowls into a water bath. The water for the bath should be hot water from the tap. Carefully transfer the tray into the oven and cook at 325F for 20-30 minutes. Check the custard to see if it has set. Sweet potato custard sets up fast so keep an eye on it. The Joy of Cooking states: “The trick is to pull the pie from the oven as soon as the filling has thickened to a gelatin-like consistency in the center.”

Don’t overcook custard! Quickly remove the custard bowls from the water bath and let cool. Refrigerate until ready to serve.

sweet-potato-custard-3

Quickly remove the custard bowls from the water bath and let cool.

sweet-potato-custard-4

Spoon the fried bananas and nuts over the top of the custard. Drizzle with melted chocolate.

Banana Filling
4 organic bananas, sliced
1/4c organic coconut oil
1/4c organic butter
1/2tsp sea salt
1c organic walnuts
1-2T local honey

In a fry pan, warm the coconut oil, butter and salt over medium heat. Toast the walnuts until just browned slightly. Add the banana slices and brown. Remove from the heat and add the honey. After the banana filling has cooled to room temperature, spoon out an equal amount of filling onto each custard. Drizzle with melted chocolate.

Whip Cream Topping and Drizzled Chocolate

2c organic whipping cream
1T local honey
1 pinch sea salt
1/2c organic 70% dark chocolate, pieces

Half fill a sauce pan with water. Place a Pyrex measuring cup filled with chocolate pieces in the water and bring to a simmer. Stir and let the chocolate melt before removing from the heat. Use a teaspoon for drizzling the melted chocolate on the banana layer.

In a food processor, add the whipping cream, honey and salt and blend until the whipping cream is firm. Top each custard with whipping cream and use the last of the melted chocolate to drizzle on top of the whipping cream. Serve immediately!

Nutty Meatloaf

meatloaf

Meatloaf is an excellent lunch or travel food and is very nice by itself or served with raw cheese. Bring meatloaf to your next picnic!

This recipe is based on Spicy Meat Loaf from Nourishing Traditions by Sally Fallon-Morell.

This recipe is safe for someone on the Specific Carbohydrate Diet or GAPS.

2 pounds pastured ground beef
1 large organic onion, chopped
1 stalk organic celery, chopped
1 large organic carrot or yellow beet, chopped
1/4c butter or lard
1 organic bird’s eye pepper, crushed
1tsp organic thyme
1tsp organic peppercorn, freshly ground
1tsp sea salt
1c organic walnuts, chopped
2-3 pastured whole eggs
Grease a glass bread pan with butter or lard. Preheat the oven to 325F. Saute the chopped onions, celery, carrots and spices in butter or lard. In a large bowl mix the raw ground beef with the sauted vegetables. Add the walnuts and eggs one at a time. Mix very well and form the mixture into a log shape before placing into the bread pan. Press the mixture down firmly. Cook for 45-60 minutes. Let cool before slicing. Serve warm or cold with cheese or homemade spicy ketchup.

ketchup-meatloaf

Meatloaf can be dressed up with some homemade spicy ketchup.

Car Camping, Special Diets and Nourishing Traditional Foods

car-camping-1

Making hot drinks and breakfast at a rest stop in the United States.

Recently, I did a 5000km (3000 mile) road trip in the United States. Travel for someone on a restrictive diet can be difficult. I would like to share some of my strategies for finding and preparing food on the road. Even if you don’t have a special diet, these tips may help save money on food while traveling.

  1. Be aware of restricted foods before crossing any borders. I found a list of food items for the border police is very helpful and speeds up the process. Also, have a list of items with prices to declare for the trip back.
  2. Bring water for your trip. I bring a minimum of 2.5 gallons per person. I refill the containers along the way and always have a full supply of water. I also carry two stainless steel water bottles for easy use and refill them daily.
  3. Bring supplies from home. Bringing food from home helps keep one’s diet as close to normal as possible. This avoids stress from changes in diet that may result in illness. Typical supplies are: olive oil, apple cider vinegar, honey, coconut oil, creamed coconut, barley miso, chocolate bits, cocoa nibs, macha, coffee and tea. I also brought homemade salad dressing, homemade beef jerky, homemade nut granola, homemade coconut creamer and homemade mushroom broth.
  4. Bring a cooler with ready-made food that’s easy to eat. My ready-made food lasted for the first three days of the trip. My ready-made food included: bean salad, meatloaf, kimchi, butter, cheese and cream. Bring food that everyone enjoys.
  5. Have some way to heat water. Have enough kitchen equipment to cook on the road. Fill thermoses and travel mugs with coffee, tea and hot water in the morning for use throughout the day.
  6. Use new technology to find local, organic food. Finding food along the way can be tough but with new technology it’s getting much easier. Smart phones can search out organic food stores and other local food producers in whatever area you are visiting. If you don’t use a smart phone finding places to provision before you leave home is a must.
car-camping-1a

Here’s my water heating system. I use a simple alcohol stove fueled by methyl hydrate. The front of the cooking box can be closed up to stop the wind from blowing out the stove.

Over the years I have used many different types of stoves and camping kitchen equipment. Right now I’m using a small alcohol stove fueled with 99.9% methyl hydrate. You can find methyl hydrate at the paint or hardware store. I carry two stainless steel pots. One small pot and one larger pot that can boil 1.5L of water. A French press is good for making coffee. Stainless steel thermoses and insulated travel mugs are a great way to keep coffee, tea and hot water warm all day.

Recently, I have started cooking in a cardboard box. This may seem like a strange idea but the box is good for storing all the cooking gear in one place, and acts like a wind shield, making cooking faster while conserving fuel. When the box gets dirty it can be discarded. Just cut one side of the box with a box-cutter and fold up that side when cooking to reduce air flow. Of course, while cooking always watch the box so it doesn’t catch on fire!

Camping kitchen kits are great too. You can make your own or buy a ready made one. I bought a ready made one years ago and over time customized it. My customized kitchen kit has a cutting board, box-cutter, sheathed knife, 2-4 spoons, 2-4 forks, spice and condiment bottles, a lighter, scrubby pad and small bottle of dish soap for clean-up. I carry 2-4 bowl-shaped plates for cutting-on and eating which also fit inside the kitchen kit. I carry a supply of paper towels in a zip-lock bag for eating and wiping-off eating equipment for those times when there’s no water for washing-up. I’ve started carrying some small bars of soap and shampoo packages like the kind you would get staying at a hotel.

car-camping-1b

Here’s my customized, camping kitchen kit. It has everything I need to prepare simple meals. As you can see, the equipment sees heavy use. I really like having a sheathed knife to avoid damage to the kit. Bowl-shaped plates are great for liquids and can be used as a cutting board.

Here are some ideas for quick, simple snacks and meals while traveling:

  1. Soft-boil 2-3 eggs per person and serve with lots of butter, sea salt and pepper. It takes about 2 minutes to soft-boil eggs.
  2. Homemade nut granola with chopped fresh, local fruit served with yogurt.
  3. When there isn’t time to cook, add some butter, coconut oil or homemade coconut creamer in coffee or mushroom broth for a quick, filling hot drink.
  4. Eat a handful of whole nuts. On this trip, the local pistachios were fantastic.
  5. Eat a small amount of beef jerky.
  6. Eat cooked meats, chicken or fish using a lettuce leaf as a wrap. Add some fresh avocado slices for an extra filling meal.
  7. If you’re on the road and really desperate, Sally Fallon-Morell recommends eating pork rings with only added salt. I’ve found this advice has worked well for me even though I’m very sensitive to food additives.

For more information about my typical traveling rations please see: Emergency Preparation: Some Thoughts About Water and Food Security.

If you are looking for light-weight, calorie dense rations for travel please see: Emergency Preparation: Fasting or Ketogenic Rations.

eggs-butter

A favorite breakfast on the road is soft boiled eggs topped with butter, sea salt and pepper. We re-purposed old egg cartons into one use egg cups.