Sweet and Spicy Ribs: Photo Essay

gobox-ribfest-6a

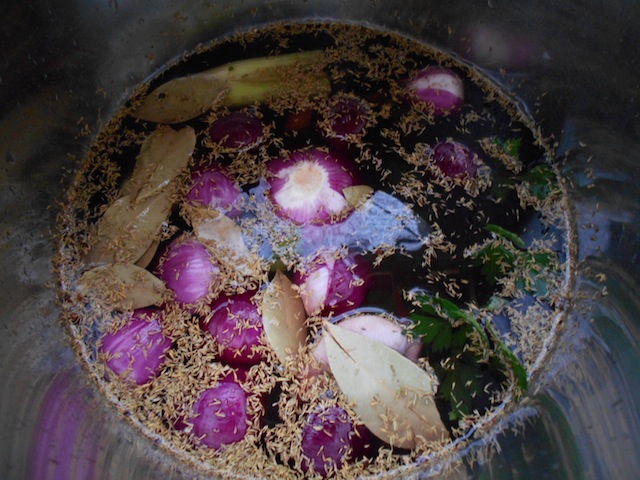
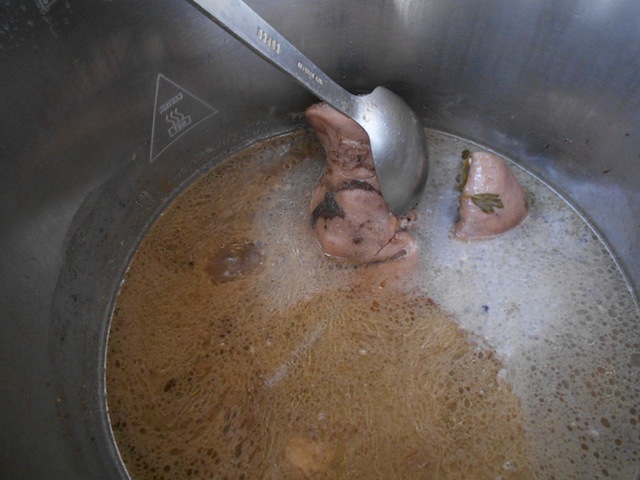
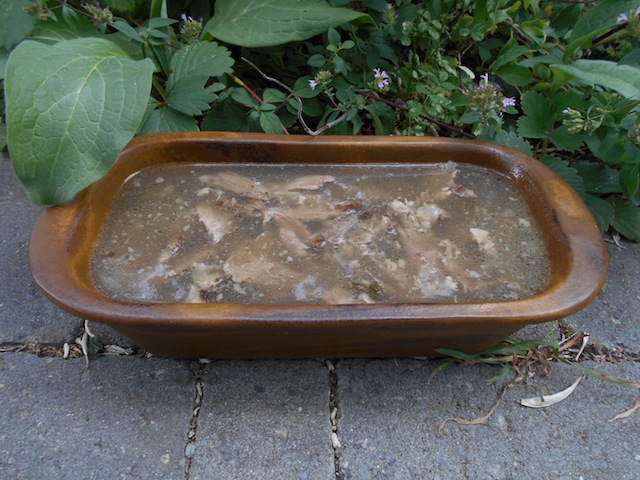
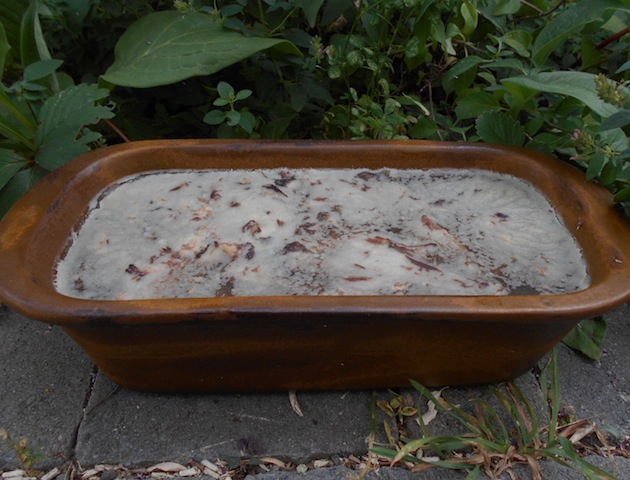
Being frugal our family has our own rib festival at home. We also save the pork fat for later cooking and the bones for bone broth.

Kamloops RibFest has just ended. We decided to have our own RibFest at home. Being frugal we can feed the whole family for the price of one serving of festive ribs. Here’s what we do for delicious, homemade ribs!

Rib Marinate
2-3T organic cider vinegar
1tsp sea salt
1 organic bird’s eye pepper

Cut up a whole rack of ribs into small pieces. Use a mallet and clever to cut through the bones. Place the ribs into a glass baking tray. Marinate the ribs in cider vinegar and spices for at least 30-60 minutes at room temperature. Longer is better.

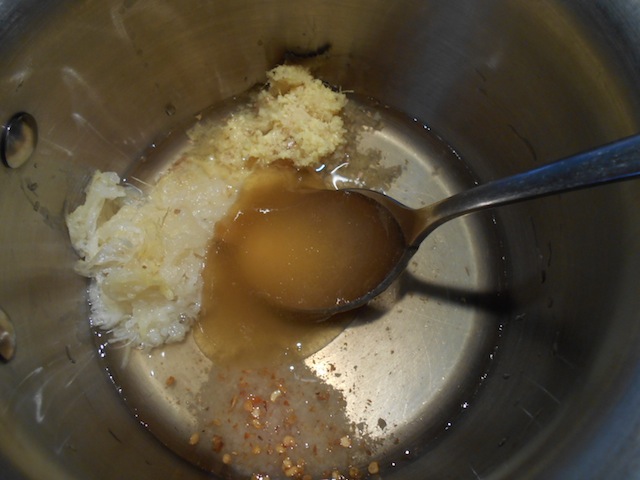
Rib Sweet and Spicy Sauce
1/4c to 1/3c organic cider vinegar
1/4c organic ginger, finely grated
1/4c organic garlic, finely grated
1tsp sea salt
1 organic bird’s eye pepper
1T local honey

In a sauce pan mix up the cider vinegar, ginger, garlic, sea salt, pepper and honey. Bring the mixture to a boil and set aside for later. This sauce will be added to the ribs in the last 20-30 minutes of cooking.

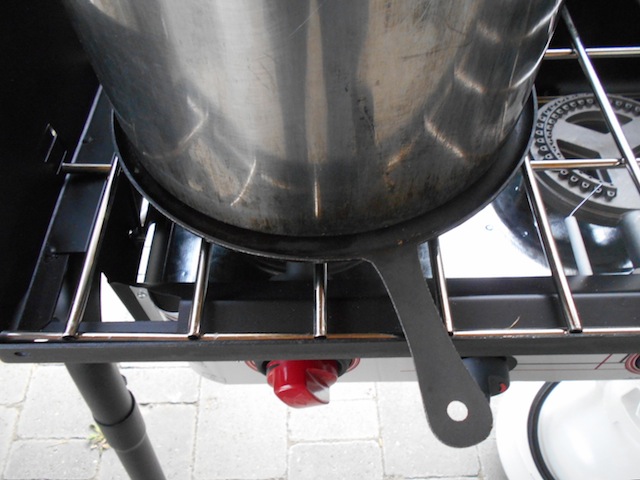
Cook the marinated ribs at 300F for 90-120 minutes. Have one layer of ribs so the ribs will brown nicely. Use two glass trays, if necessary. When the ribs are done, pour off the fat and save it for later cooking. Any drippings from the ribs are added to the spicy sauce. Save the rib bones for making Bone Broth.

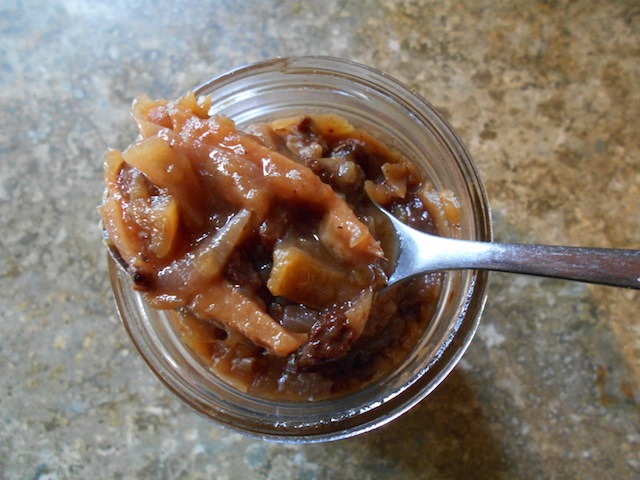
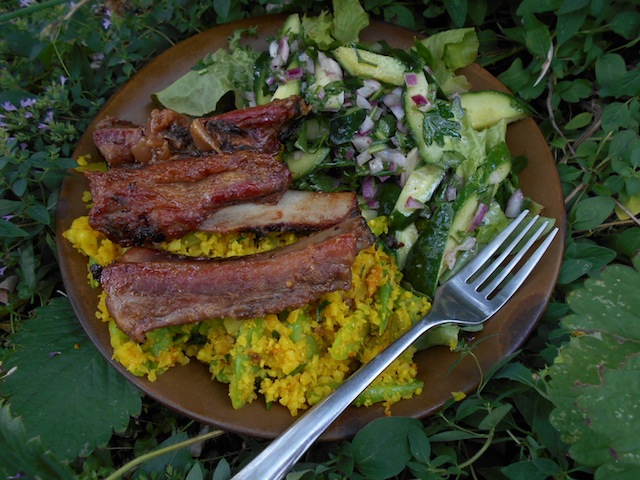
After the ribs are nicely browned, stir in the spicy sauce and cook for another 20-30 minutes. Carefully check and stir the ribs every 10 minutes to avoid the sauce from burning. If you want sweeter ribs, add two tablespoons of Apple Chutney just before serving.

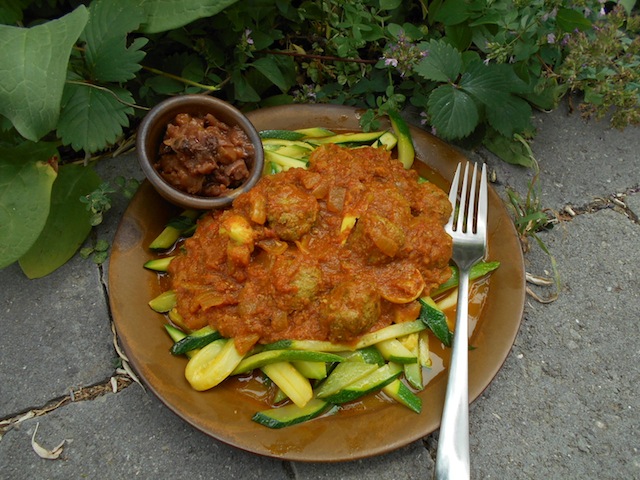
Serve the ribs on a bed of Cauliflower Side Dish and have a garden salad with Mustard Dressing on the side.

gobox-ribfest-1

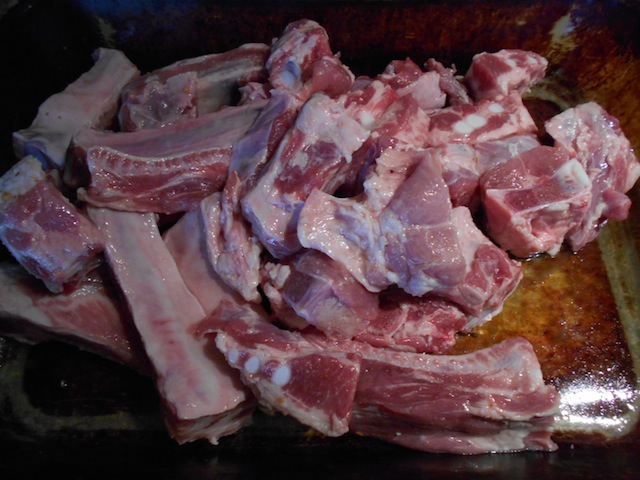
Marinate the ribs for at least 30-60 minutes at room temperature.

gobox-ribfest-2

Heat the Sweet and Spicy Sauce to the boiling point and set aside for later use.

gobox-ribfest-4

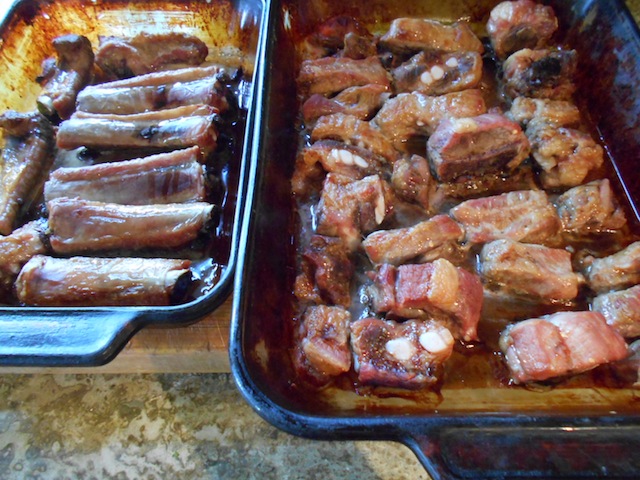
Place the ribs in one layer on the glass tray. This ensures the ribs brown well. Use two trays, if necessary.

gobox-ribfest-5

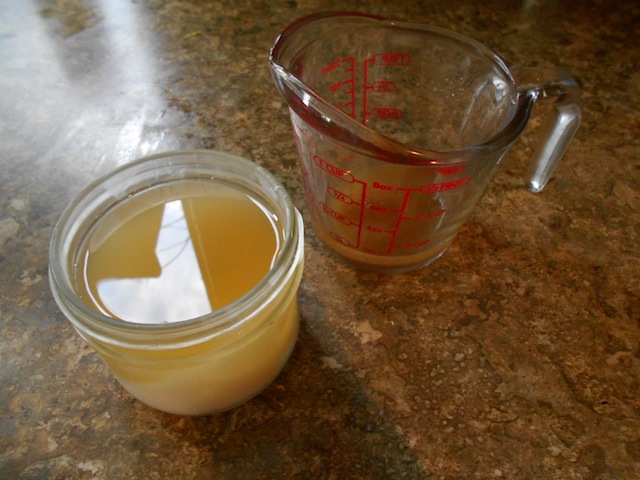
When the ribs are done, pour off the fat for later cooking. Put any rib drippings into the sauce.

gobox-ribfest-6

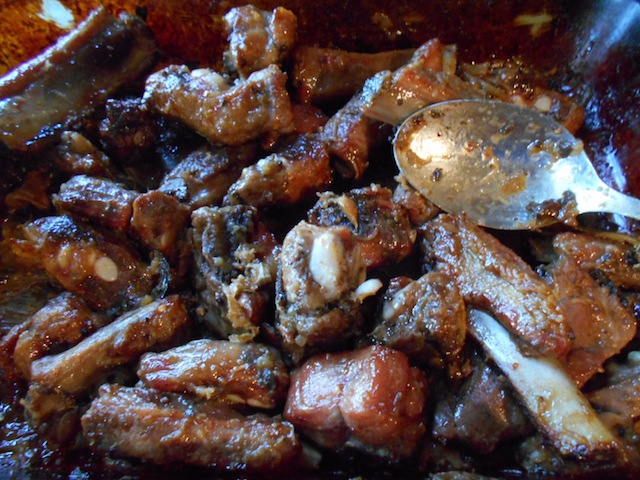
After adding the sauce to the ribs, check and stir every 10 minutes to avoid burning.

gobox-ribfest-3

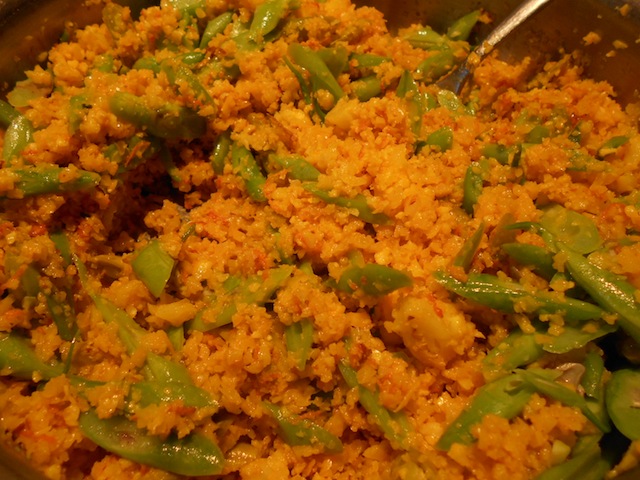
Serve the ribs on a bed of Cauliflower Side Dish with seasonal, garden vegetables.

gobox-ribfest-3a

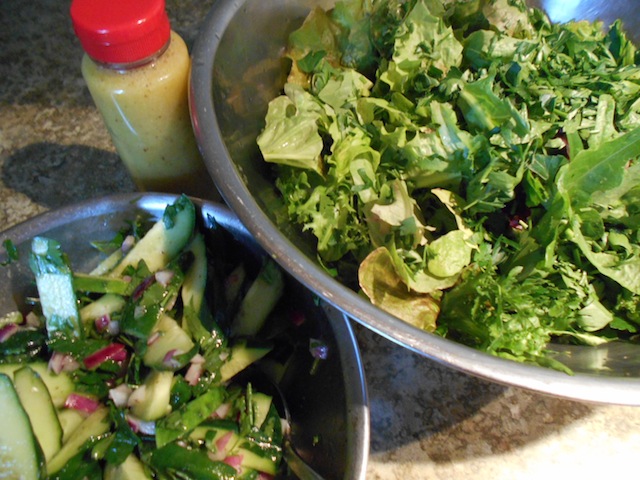
These ribs are nice with a side of garden salad topped with Mustard Dressing.

Easy Garam Masala and Paleo Kofta Curry

zuc-kofta-chutney

This Kofta Curry is on a bed of zucchini, fried in coconut and palm oil, with a side of Apple Chutney.

This recipe is safe for someone on the Specific Carbohydrate Diet or GAPS.

Garam Masala is the secret ingredient to make delicious kofta. The secret to making excellent Garam Masala is freshly ground, whole spices.

Garam Masala
2T organic whole cumin
1T organic whole coriander
1T organic whole cardamon
1T organic whole black peppercorns
1 organic cinnamon stick
1tsp organic whole cloves
1 organic whole nutmeg
Freshly grind the whole spice in a spice grinder. Use half the recipe in the curry sauce and half in the kofta balls.

Fresh Spice Mix
6 cloves organic garlic, freshly grated
8T organic fresh ginger, freshly grated
6T organic fresh turmeric, freshly grated
Freshly grate the garlic, ginger and turmeric. Put half of the grated garlic, ginger and turmeric in the curry sauce and half in the kofta balls.

Base Curry
3-4T organic coconut oil
1T organic palm oil
2 large organic onions, finely chopped
1tsp sea salt
1/2 Garam Masala recipe, above
1/2 Fresh Spice Mix, above
15-18 organic Roma tomatoes, remove skins
5 organic dates, finely chopped
In a large, non-reactive Dutch oven, sauté the onions and sea salt in the coconut and palm oil. When onions are browned add half of the grated spices and tomatoes. Simmer the curry for 15 minutes with the lid on. Add the dates and simmer for 30 minutes with the lid off. Make the meat balls while the curry simmers.

Kofta Balls
2 pounds pastured ground beef
2 pastured eggs
1tsp sea salt
1/2 Garam Masala recipe, above
1/2 Fresh Spice Mix, above
In a large bowl, mix the beef, eggs, sea salt and grated spice very well. The kofta balls should be made into walnut sized balls. When finished all the kofta balls, carefully place the balls in one layer into the simmering curry sauce. Try not to have the balls touching. Simmer again for 15-30 minutes or until the balls are done. Serve Kofta Curry with some Apple Chutney on a bed of Cauliflower Side Dish or seasonal vegetables.

Seasonal Food: Apple Chutney

apple-chutney

Apple Chutney is very easy to make and uses seasonal (and wormy) apples. This chutney is great with curry.

This recipe is safe for someone on the Specific Carbohydrate Diet or GAPS.

This Apple Chutney has become a family favorite. The chutney is a nice addition to curry recipes. This recipe is a great use for frozen or wormy apples. This recipe is based on an Apple Chutney recipe from The Joy of Cooking. I’ve made some changes.

1 bag frozen Apple Pie Mix, green apples best
2 large organic onions, sliced
1 organic lemon peel, finely grated
1/2c organic ginger, finely grated
6 cloves organic garlic, finely grated
1c organic raisins
2c organic cider vinegar
2tsp sea salt

If you don’t have a bag of frozen Apple Pie Mix, use 8-10 green apples, cored and sliced. Place all the ingredient in a non-reactive Dutch oven and bring to a boil. Simmer for two hours, stirring occasionally to ensure the chutney does not scorch. Store the chutney in mason jars in the fridge. The chutney will last for months in the fridge.

Seasonal Food: Frozen Apple Pie Mix

frozen-apple-pie-2

Frozen Apple Pie Mix makes winter pie making quick and easy.

This recipe is safe for someone on the Specific Carbohydrate Diet or GAPS.

This recipe is for bulk processing of large amounts of seasonal apples. We usually process over 200 pounds of apples from our garden. Some apples are dehydrated and some frozen. Adding pie spice before freezing can save time during the winter months.

6-8 organic cinnamon sticks
1-2 organic whole nutmeg
2T organic whole allspice
2T organic cane sugar (optional)

Spices are best freshly ground, if possible. Grind all the spice in a spice grinder. Grind in a number of loads, if necessary. You will need about two heaping tablespoons of Apple Pie Mix for each freezer bag of sliced apples. Double or triple this recipe depending on how many apples need processing.

Clean and slice the apples. In a large bowl, mix the Apple Pie Mix with the apples and pour the spiced apple mixture into a freezer bag. Fill the bag about 2/3 full. Alternatively, fill each bag with enough apples and spice for one pie. These frozen, spiced apples can be used for any recipe needing apples during the winter.

frozen-apple-pie-1

If you have wormy apples, don’t worry. Just clean and cut out the bad parts. This recipe will ensure delicious winter apple pie!

frozen-apple-pie-3

Put enough apples into each freezer bag for one pie.

Head Cheese: Photo Essay

pig-head-14

Head Cheese is easy to make and tastes wonderful with raw cheese or kimchi!

This recipe is safe for someone on the Specific Carbohydrate Diet or GAPS.

Head Cheese is easy to make but does require some time. Plan for one day to unfreeze the head, one night to brine the head and one day to cook and process.

Brine Solution
3/4c kosher salt
1/4c local honey
1/4c Himalayan pink salt
1-2 gallons filtered water

After the pig’s head has completely unfrozen, wash carefully and shave off any excessive hair. Soak the head in cold water for two hours. Mix up the brine solution. Use a small amount of boiling water to melt the honey and dissolve the salts. After two hours soaking in cold water, wash the head again and place the head in the brine solution. Add one to two gallons (or a bit more) of cold water to cover the head. Use a heavy plate to weigh down the head below the level of the brine solution. Leave the head in the brine solution for at least 8 hours or overnight. Remove the head and wash again. Discard the brine solution after use.

Broth
4 medium organic onions
2 organic celery ends
6-8 organic garlic cloves
1 bottle dry red wine
1 bunch garden parsley
1T organic thyme
2tsp organic black peppercorns
8 organic bay leaves
1tsp organic cloves
sea salt, to taste
1T Great Lakes Gelatin
2c warm broth
2T organic peppercorns, cracked (optional)

In a very large stock pot place the brined head with the vegetables, spices and wine. Add enough water to cover the head. Bring to a boil and reduce to a simmer for about four hours or until the jaw bone falls off. Remove the head and let cool. Carefully strain the broth and discard the spent vegetables and spices. Skim the broth of fat, if necessary. Add some sea salt to taste. Add one tablespoon of gelatin to some cold water and let sit for at least five minutes before addling to two cups of broth. This will ensure a firm jelly.

When the meat has cooled remove all the skin, fat, connective tissue and bones. (These remains make good pet food so freeze in appropriate portion sizes for your pet.) Coarsely cut or pull the meat into pieces. Place the meat into a terrine or glass baking tray. Press the meat down firmly before pouring on the broth. Reheat the broth if necessary to pour over the meat. Pour enough broth to cover the meat. Refrigerate overnight. After the gelatin has partly set up, add the optional cracked peppercorns to the top.

pig-head-1

Give Piggy 24 hours to unfreeze before you start processing.

pig-head-2

Piggy needed a good wash and a shave! Soak Piggy in some cold water for 2 hours, then wash again.

pig-head-3

Put Piggy into a food grade, 5 gallon pail with the brine solution.

pig-head-4

Place a plate on Piggy to keep him under the brine solution. Leave Piggy in the brine solution for at least 8 hours or overnight.

pig-head-9

My husband got the portable cooker ready for use. We don’t like cooking in the house during the summer months. This helps keep the house cool without air-conditioning.

pig-head-6

Piggy got a long rinse before being put in a very large pot with some vegetables, spices and red wine. Use just enough water to cover Piggy.

pig-head-7

I prefer to use a very heavy lid for long simmering.

pig-head-8

This is what the stock looks like just before the boiling point. Piggy needs to cook for about four hours or until his jaw falls off.

pig-head-10

This isn’t a proper stock pot with a heavy bottom for long simmering. This pot was designed for deep frying turkeys. We use it for processing chickens for freezer camp. The bottom of the pot is very thin and I was concerned the meat might get scorched. I found a case iron crepe pan to work as protection for the bottom of the pot.

pig-head-11

Piggy’s jaw didn’t fall off after four hours of cooking so I gave an extra hour. Piggy gave about 2 gallons of broth. I’m thinking the broth will make wonderful French Onion Soup and Wild Mushroom Soup.

pig-head-12

I cleaned the skin, fat, connective tissue and bone from the meat. I had enough meat for one bread pan. (Piggy’s cheeks had already been removed.) These discarded parts got portioned and put in the freezer for our warehouse cat. She will have many meals from Piggy’s remains.

pig-head-13

In the morning, the head cheese was ready! Next time I’ll add cracked peppercorns for the top!