Paleo Paella

paleo-paella

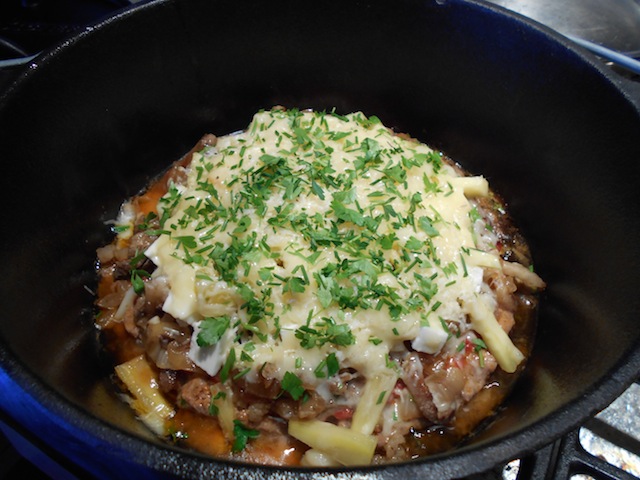
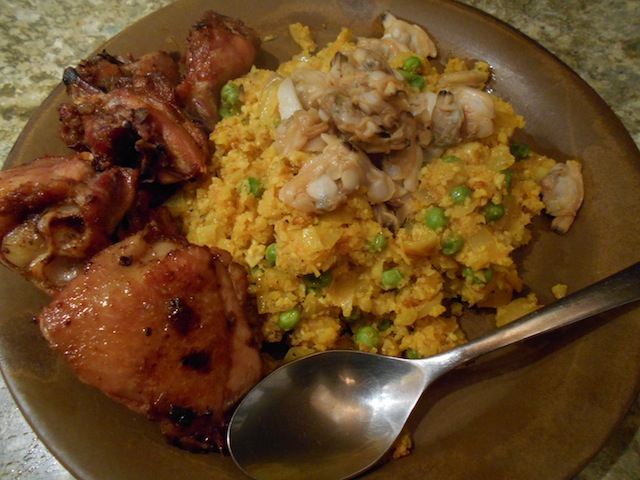
This Paleo Paella is grain-free. The rice portion of this dish is replaced with cauliflower. This version is nice for people looking to avoid grains or wanting to get more vegetables into their diet.

This recipe is safe for someone on the Specific Carbohydrate Diet, GAPS or the modified paleo diet.

Oven Baked Chicken

1 pastured whole chicken, cut into small pieces
1/4c organic olive oil
1tsp sea salt
1tsp organic black peppercorns, freshly ground
2tsp organic smoked paprika
Cut up the whole chicken into small pieces. (Reserve the breast meat for other meals, if desired.) Use a clever and mallet to cut through the bones. If you don’t know how to cut up a chicken please refer to The Joy of Cooking or watch a video on the internet. Coat the chicken pieces with the olive oil. While stirring the chicken pieces sprinkle with the spice mixture. Let the chicken pieces marinate in the spice mixture for one hour. Spread the chickens pieces on a glass baking tray and bake at 300F for 45 minutes. Turn the pieces and remove the chicken juices and reserve for the paella. Cook the chicken pieces for another 30 minutes or until done.

Cauliflower Paella

1/3c organic olive oil
2 medium organic onions, chopped
1tsp sea salt
1 organic cauliflower head, finely minced
1tsp fresh rosemary, finely minced
3-4 organic whole Roma tomatoes, frozen
1T turmeric root, freshly ground
1T palm oil
1tsp organic black peppercorns, freshly ground
2-4 organic garlic cloves, finely sliced
chicken juices
1c organic peas, frozen
1c fresh clams, mussels or shrimp (optional)
Finely mince the cauliflower in a food processor. In a deep, large fry pan, saut? the onions in sea salt and olive oil until lightly browned. Add the cauliflower, rosemary, tomatoes, turmeric and palm oil and cook until the tomatoes unfreeze. Remove the tomato skins, if desired. Stir in the ground peppercorns, garlic and chicken juices. Remove from the heat until the chicken is ready. Add the peas and optional seafood and reheat the paella just before serving with the chicken pieces.

Plumy Cranberry Sauce

plumy-cranberry-sauce-1

Adding local ingredients to a traditional recipe is a great way to develop unique regional flavors.

This recipe is safe for someone on the Specific Carbohydrate Diet, GAPS or the modified paleo diet.

This Thanksgiving I didn’t have enough cranberries to make enough sauce to satisfy my family. It looked like I was going to have to make a last minute trip to the grocery store. I’ve made it a habit to always look around the house for possible substitutes before jumping into the car. By thinking before acting, I save time and money.

Since we had a bumper crop of prune plums this year, finding interesting ways to use plums has become a priority. I knew plums produce a beautiful red color when cooked so I decided to try adding the plums to the cranberry sauce. Using plums we grow on the property means the cranberries we have to buy go further, which saves our family money.

Plumy Cranberry Sauce

1c garden prune plums, frozen
1c organic cranberries, frozen
2/3c filtered water
1/2tsp sea salt
1-2T raw local honey
In a sauce pan, simmer the plums, cranberries and sea salt in the filtered water for 20-30 minutes until the cranberries burst. Remove from the heat and allow the sauce to cool down. Add the honey one tablespoon at a time and stir very well. This is easier if the sauce is still warm. Be careful not to add too much honey. Chill before serving. This sauce goes well with turkey, chicken or pork.

plumy-cranberry-sauce-2

Using plums we grow on the property means the cranberries we have to buy go further which saves our family money.

Paleo-Plum Cake Cockaigne

paleo-plum-cockaigne

This recipe is a grain-free version of the traditional cake cockaigne. It’s a great way to use up the bounty of fruit in your garden.

This recipe is safe for someone on the Specific Carbohydrate Diet, GAPS or the modified paleo diet.

Every year the permaculture garden produces something to excess. Storing this bounty by drying or canning is one solution. Giving some of the it away is another. I also like finding new recipes to utilize the excess food. Each year that goes by, I learn more and more new recipes and how to see these windfalls as a great blessing and not a result of bad planning!

This year the permaculture garden has a bounty of plums. Plums, plums and more plums. We enjoy eating pounds and pounds of the fresh fruit but sometimes a cooked dessert is welcome. This recipe is a grain-free version of cake cockaigne. Finely grinding the flaked coconut is the secret to a creamy cake-like topping.

Filling
4-6c pitted garden plums, sliced
1 garden apple, chopped
1T local honey (optional)
1T organic unsalted butter

Cake Topping
1c organic coconut flakes, very finely ground
3T organic unsalted butter
pinch of sea salt
1T honey
3 whole organic eggs
3T organic whipping cream

Preheat the oven to 400F. Butter the cake pan well. Cut up the apple and plums and mix together well. Add some honey if the plums are too sour though this dessert is naturally a bit sour. Press down the fruit into the cake pan.

In a Vitamix machine, finely grind the coconut in small amounts and put the finely ground coconut into a bowl. I usually do about 1/3c at a time for the best results. (You could substitute coconut flour for the coconut flakes but I prefer to use whole ingredients whenever possible.) Add the salt and crumble in the butter. Add the eggs, honey and cream in the Vitamix machine and blend well. Add the coconut mixture in three amounts and blend very well. The cake mixture should have the yellow colour and texture of a normal white cake. Spoon the cake mixture on top of the filling and spread evenly over the fruit. Cook for 20-25 minutes until brown on top.

This dessert is best served at room temperature with whipping cream which also cuts the tart taste.

Dutch Oven Pizza

dutch-oven-pizza

In the house or at the campsite, making pizza in a Dutch oven is great for summer cooking.

This recipe is safe for someone on the Specific Carbohydrate Diet, GAPS or modified paleo diet.

If I have a chance, I always try new camping equipment at home before taking the new item into the bush. Sometimes the new item never even makes it through the home trial. I have no tolerance for poorly made equipment that doesn’t deliver on its promises.

This week I’ve been testing a new camping Dutch oven called the Lodge 6 Quart Cast Iron Camp Dutch Oven. Keep in mind the Dutch oven is very heavy and would only be suitable for car camping, base camps, boating or canoeing.

Dutch ovens are not new to me. I’ve been using a Dutch oven my mother got at her wedding. That should be a testament to how robust a Dutch oven can be. This new Dutch oven is made for camping with a three legs on the bottom and the top of the lid. The lid is also extra thick and could be used as a fry pan or grill. These legs might not work on some stove tops but it worked well on my gas stove.

I seasoned the new Dutch oven with coconut oil before I started. This requires melting and letting the coconut oil just come to the smoke point and then to completely cool the Dutch oven. After the Dutch oven has cooled completely it is ready for cooking. This seasoning can be redone anytime the Dutch oven starts to stick.

I made an easy, paleo-pizza recipe for the test. This pizza is based on the recipe called? Upsidedown Pizza:

  1. I chopped and prepared the cheese, feta, pineapple, meat and vegetables.
  2. I precooked the meat topping. I browned the salted and finely sliced pork steak first, then added and browned the sliced onions. I set this aside for later.
  3. I took about a pound of meat and mixed it very well with some spices and one egg. After mixing, I made it into a ball which I pressed out to cover the bottom of the newly seasoned Dutch oven. This will be the meat crust of the pizza.
  4. On a medium flame, I cooked the meat crust. I spread evenly about 1/2 can of organic tomato paste while the meat crust was cooking. I did have to be careful not to burn myself on the hot sides of the Dutch oven.
  5. When the meat crust was mostly cooked through I topped the pizza with the cooked meat and onions. Then I added a layer of feta and two other kinds of cheese. I put the lid on and reduced the heat to low and simmered for 10 minutes. I removed the lid a few times to remove any steam (water) that would make the pizza soggy. The water collects on the lid. I dumped this water into the sink.
  6. The pizza was done very quickly and the house was not heated up by using the oven. I added some garden parsley and chives.
  7. This 9″ pizza was very filling. It fed two people to the overfull point. With a side dish the pizza could feed four people.

Cauliflower Summer Salad with Crispy Walnuts

lunch-kit-week-3

HAPPY LONGEST DAY! Cauliflower Summer Salad travels well and is a good addition to picnics or camping trips.

This salad reminds me of an old favorite couscous (or bulgur wheat) salad. This salad does not use any grains and is safe for someone on the Specific Carbohydrate Diet, GAPS or a modified Paleo Diet.

Crispy Walnuts

1-2c organic walnuts, coarsely chopped
1T organic coconut oil
1tsp sea salt
In a cast-iron frying pan, melt some coconut oil over a medium heat. Add the walnuts and sea salt and stir while they toast. Don’t overcook. Remove from heat and store in the fridge for snacks or as a topping for salads.

Cauliflower Summer Salad

2-3c Cauliflower Side Dish, chilled
1/2 organic long cucumber, sliced
1/2c garden parley or lovage, chopped
4-6 garden radishes, sliced (optional)
2-3T garden chives, chopped finely (optional)
1/2c organic crispy walnuts, chopped
sea salt and freshly ground pepper, to taste
This salad is good with any fresh vegetables from the garden. Don’t be limited by the normal. Use your imagination and enjoy! In a large bowl, mix the Cauliflower Side. Dish with the vegetables and walnuts. Add sea salt and pepper, if needed.